“Muscle Car Upgrade” by MetalWorks Classics
Photos and text by Chadly Johnson
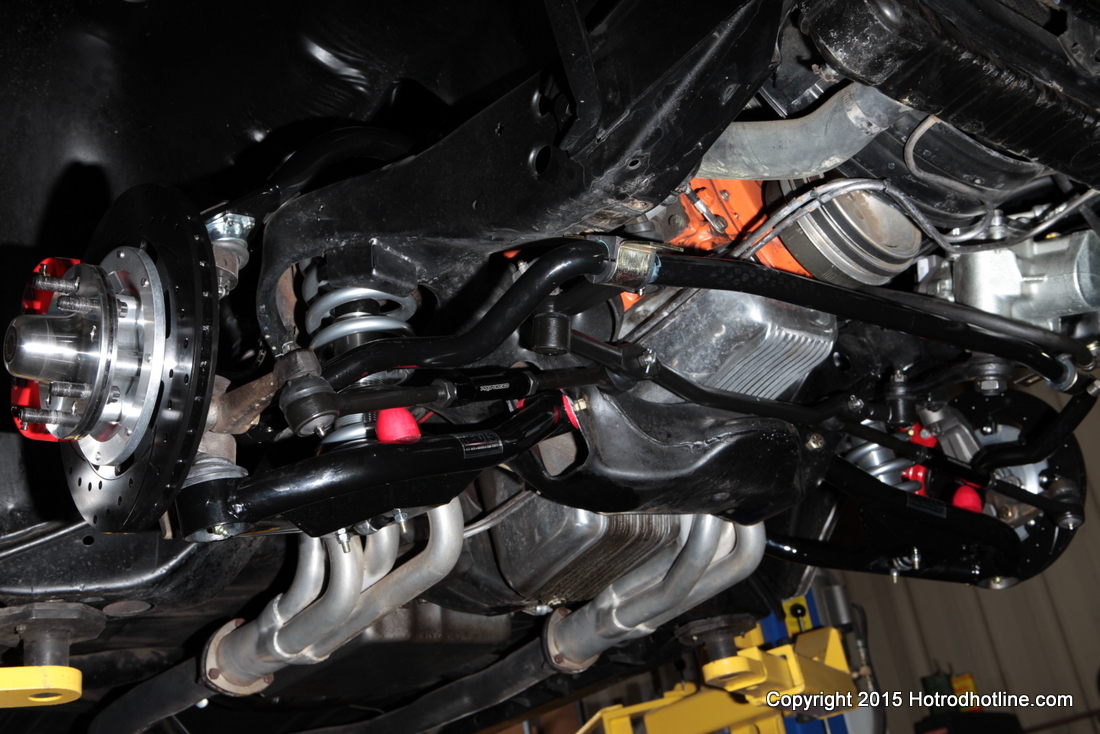
The first step in the Chevelle’s upgrade was to tackle the front suspension. For this, we chose a Heidts front suspension kit utilizing tubular upper and lower control arms. This style of suspension upgrade will radically improve your cars driving and handling performance…and they also “look” awesome. So without further delay, let’s get wrenching.
.JPG)
.JPG)
.JPG)
.JPG)
.JPG)
.JPG)
.JPG)
.JPG)
Next remove your centerlink bolts, and the idler arm bolts…which are accessible through the car’s frame.
.JPG)
.JPG)
Now we can see the old steering components next to the new. Time to begin re-assembly. We used anti-seize while assembling components like the tie rod ends, etc.
.JPG)
Now, since you have your old steering components right in front of you…you are able to take measurements off from them to get yourself within the ball park for toe in/out, etc.
.JPG)
Now you can mount your steering components in the same manner you removed them…staring with your center link, then the idler arm.
.JPG)
.JPG)
.JPG)
OK, now we are ready for the lower control arm…again we used anti-seize on the bushings for some lubricant, as well as to eliminate squeaking. The control arm installs the same way the old one came out.
.JPG)
.JPG)
.JPG)
Don’t forget to re-install your alignment shims in their proper locations when installing the upper control arm.
.JPG)
You can now bolt the spindle to the lower control arm…note we have installed our old steering arms onto our spindles as we mentioned earlier.
.JPG)
OK…onto the coil overs. Once again, a little anti-seize was used on about the first inch of the threads to avoid gulling while adjusting the coil overs.
.JPG)
Now install your aduster bearings where you have just applied the anti-seeze.
.JPG)
Slip the shock inside the coil, and you are ready to install.
.JPG)
.JPG)
We had the luxury of a car lift so we could get enough leverage with one guy lifting up on the lower control arm while the other guy installed the nut…but If you are alone, and without a lift… a jack under the control arm should work to lift it into place so you can get the nut spun on.
.JPG)
.JPG)
Next we torqued the steering arms to their proper spec.
.JPG)
Back to the steering…here we are re-connecting the pitman arm.
.JPG)
If you haven’t already, be sure to install your grease zerts on your steering components.
.JPG)
Next connect your tie rods to your steering arms. You can then use a tape measure to give yourself a rough alignment…be sure to always use cotter pins on all castle nuts.
.JPG)
Adjusting is made much easier with the adjuster sleeves provided on your tie rods.
.JPG)
And you are about set!! If you are not comfortable with fine tuning your alignemnt (like me)…you can have it professionally dailed in by your local alignment shop.
.JPG)
.JPG)
.JPG)