INSTALLING A BATTERY IN THE TRUNK
Story & Photos By Jim Clark (The Hot Rod MD)
Most cars and trucks have the battery located within the engine compartment. This places it close to the starter, shortening the cables, thereby reducing the drop in voltage often caused when long cables are used. However, this is often not possible in early hot rods that have small engine bays or in vehicles with extremely large engines.
This makes it necessary to place the battery in the trunk or in a box attached to the inside of the frame rail. Installing the battery in the trunk is the preferred option because this provides better access and protects the battery from the elements. The process is simple as long as a few basic mounting practices are followed.
A battery box must be used to isolate the battery from any other items in the area and it should be securely mounted to the floor or on a platform within the trunk. With lead/acid batteries it is important to mount them level and make sure that they are vented properly. The new sealed Spiral Cell lead/acid batteries like the Optima don’t have to be mounted level and don’t need the venting but still should be isolated in a battery enclosure of some type.
Cables from the battery to the starter need to be of a bigger gauge (01 usually) to compensate for the voltage drop created from the longer run. A short ground cable of the same size can be run to the frame but another short cable of the same size should run from the engine to the frame to complete the ground circuit.
The photos and captions chronicle the installation of an Optima battery in a Bitchin’ finned aluminum battery box within the trunk of my deuce hi-boy roadster. It is placed on the left side because the starter is located on the left side of the Nailhead Buick powering the roadster. Most popular engine choices have the starter on the right so it may be more convenient to place the battery there.
Remember, newer vehicles with on-board electronics such as computers, alarms, etc, require battery power to retain system memory while the vehicle is parked. If the vehicle is to be stored for long periods you should use a maintenance charger to compensate for this drain. This charger should be voltage regulated between 13.2 – 13.8 volts, 1 amp maximum. On older vehicles, without electronics, disconnect the battery cables when the vehicle is not being used for extended periods.
Safety and Handling
- Always wear proper eye, face and hand protection when working with battery.
- Never lean over battery while boosting, testing, or charging.
- Exercise caution when working with metallic tools or conductors to prevent short circuits and arcing.
- Keep terminals protected to prevent accidental shorting.
- Replace any battery that has signs of damage to the terminals, case, or cover.
- Install battery in a ventilated area for operation and during charging.
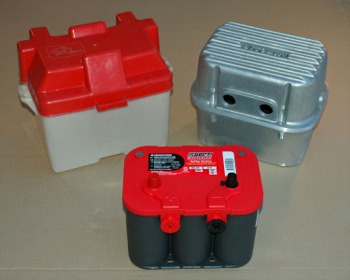 | Inexpensive battery boxes like the plastic-case type used in marine applications on the left or top-of-the-line aluminum boxes from Bitchin’ both work well for locating a battery in the trunk. Regular lead/acid type batteries can be placed inside the vehicle trunk if vented properly: but new sealed batteries like the Optima are a better choice | |
| Bitchin’ products finned aluminum battery box bolts together in two sections with brass cable-attachment posts that screw into side outlets on the battery. Aluminum plate and foam pad are placed beneath the battery to shield it from the mounting screws in the bottom of the case | 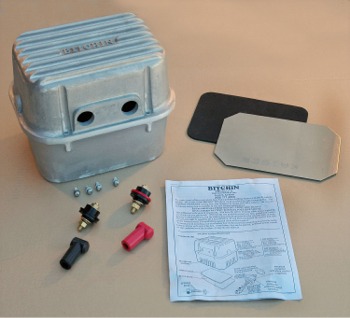 | |
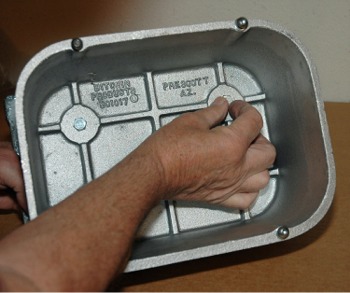
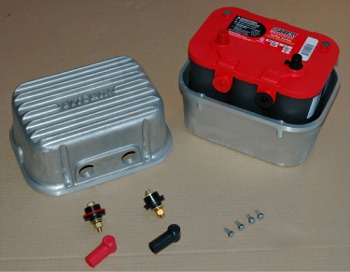 | The cast-aluminum box is sized ideally for the new Optima Spiral Cell battery. Other standard size wet-cell batteries can also be used if ventilated properly. | |
| Optima battery chosen for this application is the RedTop® Battery; Group 34/78; Cold Crank Amps 800; Crank Amps 1000; Reserve Capacity 100; Ampere Hour 50; Dual Terminal; L-10 in.; W-6 7/8 in.; H-7 13/16 in. |  | |
 | OPTIMA®’s unique SPIRALCELL® design offers the newest technology surpassing any of today’s traditional lead/acid batteries. The OPTIMA® battery, with its spill-proof case, 2x longer-life, vibration resistance and multi-position installation can provide all the power needed for this application. | |
| Mounting plate for the battery was originally fabricated from angle iron to hold a larger wet-cell battery. It was trimmed down to accommodate the new battery/battery box combo. Rectangular tubing serves as the rear support leveling the mount and weld-on studs provide attachment points to the floor | 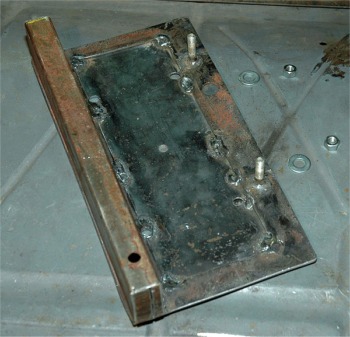 | |
 | Floors in early hot rods usually are not flat. My deuce highboy has a 90-degree rib in the floor that reaches across from side-to-side that I reinforced with angle iron trimmed and welded to the body side channels. Mounting plate for the battery box bolts through that angle and is secured to the floor | |
| Mounting plate for the battery box sits level because rectangular tubing was welded to the bottom of the plate. Tubing was cut so that the excess on the sides could be folded and welded to close off the ends. | 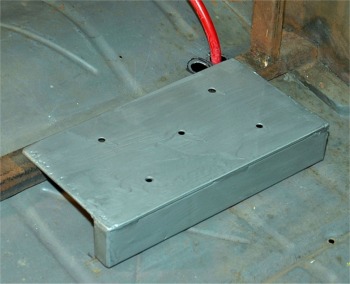 | |
 | Holes were cut through the floor so the power and ground cables could be routed through to the inside of the left frame rail | |
| Grommets protect the 01-size cables from the sharp edges of the holes and keep out moisture. Size of the holes and grommets will vary depending upon the size of the cable that is used | 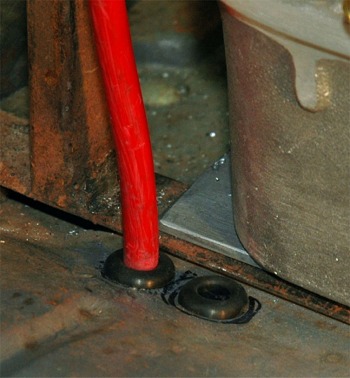 | |
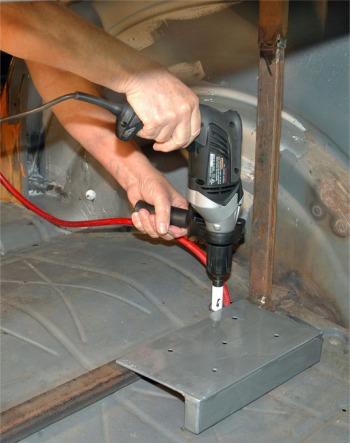
 | Holes are drilled in the bottom of the battery box and mounting plate and then attached with the appropriate hardware | |
| The protective aluminum plate and foam insulator are placed in the bottom of the battery box and the battery placed inside | 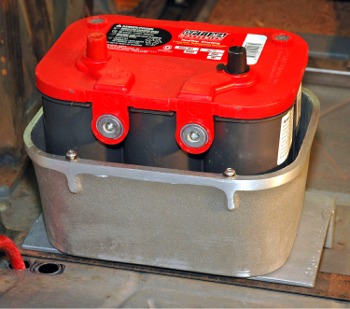 | |
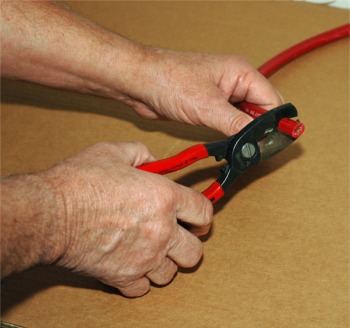 | Cable can be cut with a fine-tooth hacksaw but the job will be much cleaner using a combination cutting tool like this that both cuts and strips heavy cable | |
| Cable ends can be soldered but crimping is preferred because solder can wick up the cable reducing its flexibility. Inexpensive crimping tools for large cable do a satisfactory job but high-end crimping tools like this provide the best connection | 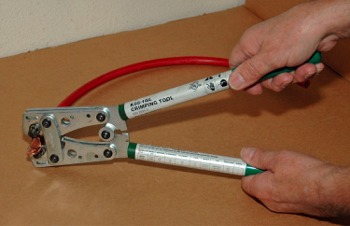 | |
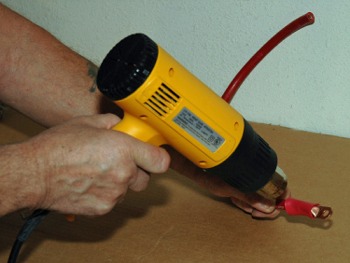 | Protecting the connection from the elements is best accomplished by covering it with glue-filled shrink tubing. Heat can be applied carefully with a small torch but a heat gun like this is the preferred method | |
| The first connection made was the black ground cable to a clean spot on the frame. It was clamped to the frame and a loop made to allow some slack in the cable | 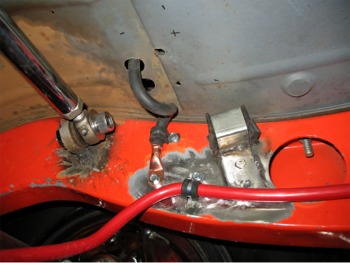 | |
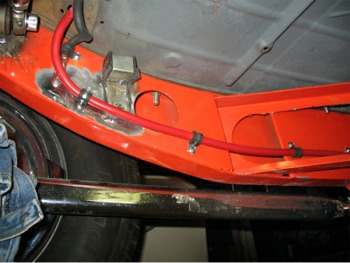 | Then the power cable was bracketed to the frame and routed forward along the inside of the left frame rail | |
| Holes were drilled in the frame rails to accommodate the self-threading hex-head cap screws used to mount the insulated brackets that hold the cable in place | 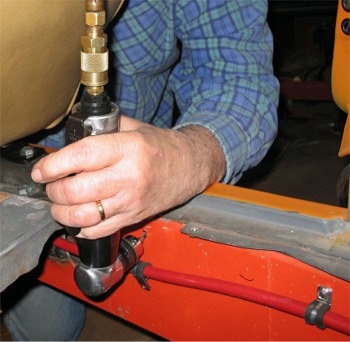 | |
 | Insulated brackets were placed at intervals along the inside of the frame rail supporting the cable and offering a solid point to attach the wiring harness to in the future | |
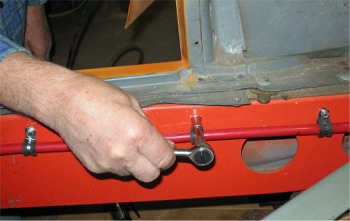
| Posts for attaching the cables are doubled-nutted and installed in the side mounts of the battery through the holes in the case | 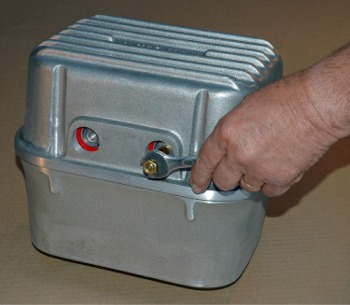 | |
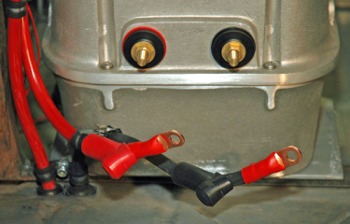 | Protective boots are placed on both cables and then the cables are attached to insulated posts projecting through the side of the battery box | |
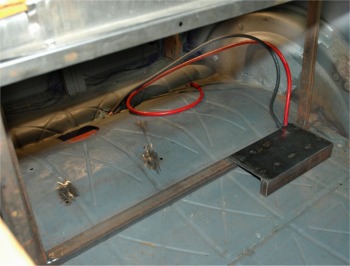
| Cable clamps hold the cables in place and protective boots cover the battery connections. Power cable actually connects to the disconnect solenoid, and then back down through the floor in this installation | 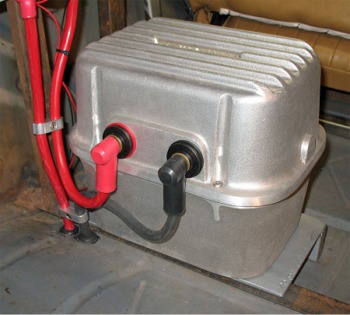 | |
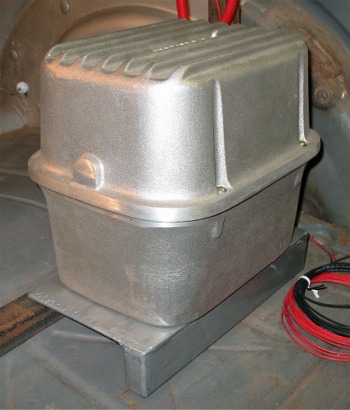 | Many options are available when fabricating a mount for the battery box. The important factors to consider are placing it in a secure and accessible location and keeping it level | |
| The positive cable was routed along the left frame rail to the starter solenoid that is located on the left side of a Buick Nailhead V-8. For cars with a starter that is located on the right you may want to route the battery cables and place the battery box on the right side of the car | 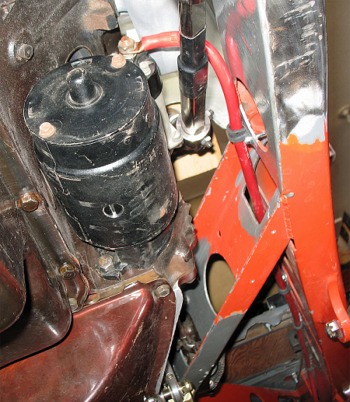 | |
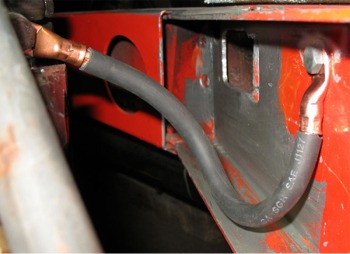 | To guarantee a solid ground a separate grounding cable needs to connect the engine/drivetrain to the frame. This short cable attaches to the transmission bellhousing and the frame X-member. Slack as left in the cable to allow for engine movement while running |