Model A Ford Top Chop
By noderel:

The Model A Ford is a relatively simple car to chop the roof on. A shade tree body man with a cut-off wheel and welding good and grinding skills can chop the top, if he goes slow and takes his time. It will require about four or five hours for just the actual chopping of the top and that doesn’t include metal finishing.
Remove the interior, trim and windows from the car. It’s a good idea to brace the body with a couple of pieces of angle iron that you can tack weld in place. Bracing keeps the body from flexing too much when the roof is cut off.
Decide where the chop line will go. A three-inch chop like the one shown here requires cutting a three-inch piece out of each roof pillar and the rear of the roof. However, it isn’t good practice to cut three inches out all around the car. Try to go through the door pillars in an area where the chop won’t disturb the hinges.
On a Model A the hinge on the front pillar determines the right place to cut three inches out. You’re best off cutting three inches out of the center pillar at a point above center. Look for a straight three-inch section. If you cut a pillar where there’s a slight curve, it’s harder to match up sections above and below the chop.
The windows have to be cut where the pillars will fit together when the top comes down three inches. The Model A has a pretty straight roof and fairly vertical pillars. When you chop the top on one, you do have to lay the front pillar back very slightly to get a perfect fit. However, you won’t have to cut the original Model A roof in four places and use a top from a donor vehicle. This saves work.
When scribing chop lines around the rear roof corners, come from the quarter window, drop down vertically almost to the belt line, go around to the rear window and then go back up vertically to the cut line. This reduces the chance of warping metal when welding. Hammer welding can take care of warping, but, by cutting near the belt line, you keep warpage to a minimum versus cutting at window height around the rear roof corners.
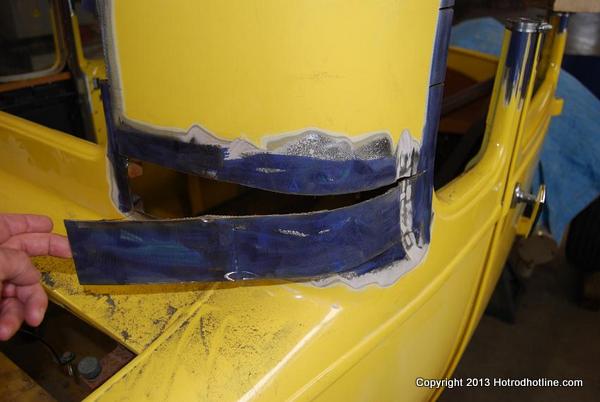
Before making chop lines, grind away paint, primer and other finish on the chop area. Use blue machinist’s layout dye to color the area. Since you can’t bend a ruler around the roof corners, make up thin sheet metal strips the size of the cut in advance. Clamp the strips to the car’s body and use as straight edges. This helps mark straight horizontal lines on the Model A’s curved rear roof panel.
To make the lines around the door and windshield posts straight, scribe chop lines on the body side of each post. Then, attach hose clamps around the posts and use them as cutting guides. Take your cut-off wheel and work your way around the posts, following the hose clamps. Without using the hose clamps as a guide, it would be very hard to get a straight cut through to the interior.
If you run into window or door posts with a thicker-than-normal area a cut-off wheel won’t cut fully through the center as you work around all four sides. Use a Sawz-All to get to the center of the posts and nip a bit off. After the roof is removed, a small grinder can flatten areas left by a Sawz-All and imperfections.
After slicing a three-inch section out of both A pillars, insert two blocks of wood in the air gap to keep the roof level. The blocks hold the other posts in position and keep Sawz-All blasé from pinching in the next cut. With the front of the roof supported in this manner, make a three-inch cut in the B pillar.
With a helper supporting the roof, take a similar cut out of the left doorpost. Again use the cut-off tool to cut along the edge of the hose clamps you put on the scribed chop line on the body side of the doorpost. Then, slice through the middle of the post, where the cut-off tool won’t reach, using the Sawz-All.
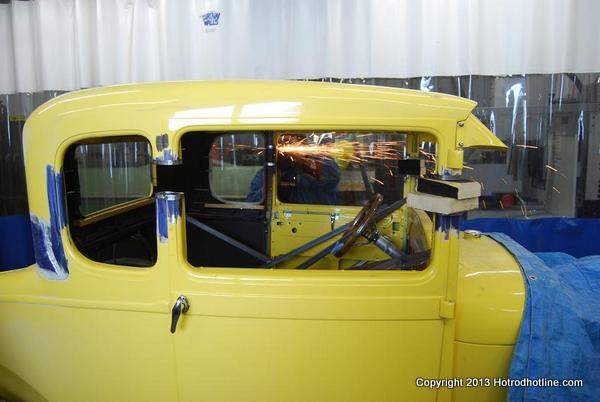
Now you can make cuts on the rear quarter sections of the roof. First, cut out a notch on each side of the rear window at just about the center. Then, cut downwards from the outer edge of the notches to the belt line. Next, cut out three-inch wide horizontal strips along the belt line that ran around the corners of the roof to the quarter windows. This turns the roof into a kind of “jigsaw piece” that drops down three inches all around, but not at the same level in each spot.
Simply stated, the rear window drops three inches from the top of the notches to the bottom of the notches, while the roof quarters drop down three inches to the belt line. This “staggered chop” takes less strength out of the metal and helps it resist warping when it gets heated with the welding torch.
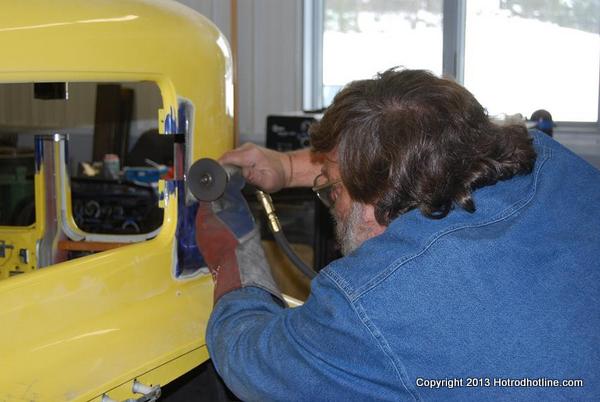
After the cuts are made on the roof rear quarters on both sides, get a helper and lift the roof completely off the car. Then, use a small grinder to flatten rough areas on the posts where cut with the Sawz-All. Dress any other imperfections, too. Then, set the roof back on check for gaps. With a little grinding here and there, get the roof to sit flat and level on all of its supports.
Measure the window openings from side to side and front to back. They must match if you want the glass to fit. Touch up the ground down areas to achieve correct measurements and to insure there are no gaps along the cut lines. If you’re doing your first chop, you’ll want spend to a lot of time on this.
Set the roof back on the car and tack weld it in place. Start by tacking all four corners, because these have to line up first. The front door posts that form the windshield frame will have to be angled slightly backwards to match up with the roof. Tack them in place in the leaned-back position.
When the roof was cut off, it probably released some tension in the metal, changing its shape slightly. You may have to push and pull on some spots to get them lined up right. If screw-jack type spreaders are available, they can be used to apply pressure or you can use 2 x 4s and grunt work to get the job done. After the roof corners are welded in place, the body panels will be under tension again.
After tacking all four corners, tack the B pillars in position. Then, move to the quarter windows. All tacked areas should be checked and re-checked to confirm they are straight and measure up just right. Then, you are ready to tack the doorframes. Straight doorframes with proper gaps all around are the goal.
Weld up chopped areas and grind the metal smooth to make it look like it hasn’t been cut. Be careful not to take too much metal off at any one spot and avoid grinding through. If you finish metal the right way, you can save time on bodywork because you won’t have to use lots of Bondo or lead. The more time you spend metal finishing, the less time the car spends in a body shop.”
After a top cop, the windshield, windows and back glass have to be cut down to match the new roof. Glasscutters have a rubber fixture they attach to both sides of the glass after marking it for cuts. Shops using the latest technology may put the windshield into something that resembles a big sandblasting booth. A very fine, high-pressure nozzle will be used and the sand burns through the glass and cuts it where marked. Then, a belt sander finishes the bottom edges.
If you’re chopping your first top, you might want to take off just a little at a time. Then lay the top down and test the fit. You may find you need to take off a little more in front. Then, you might find you needed another ¾ to one inch taken off the whole thing. It’s a trial and error process. You put the roof on and off, on and off until it’s just right. It seems laborious to work this way, but remember you’re doing the whole car without cutting the roof in half, so there’s really a lot less work to do. Some rodders think a car done this way looks better, too.
Keep in mind too that a one-inch chop is a lot and two inches is quite a bit. Three inches is extreme. Some hot rods are chopped six inches and get hard to see out of. They are not very comfortable—or safe—to drive. Also check out the laws in your state or locality to make sure you don’t wind up with an illegal chop.

Before cutting, install interior bracing to keep body from flexing.

Remove finish, put machinist blue dye on metal and scribe chop lines.

On roof quarters, cut notches, cut down to belt, then out to windows.
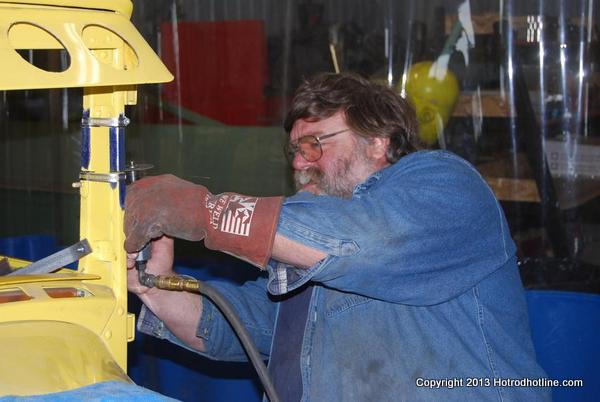
Put hose clamps on chop lines and use them as cutting guides.

Hinge position and straightness of post determine where to make the cuts.
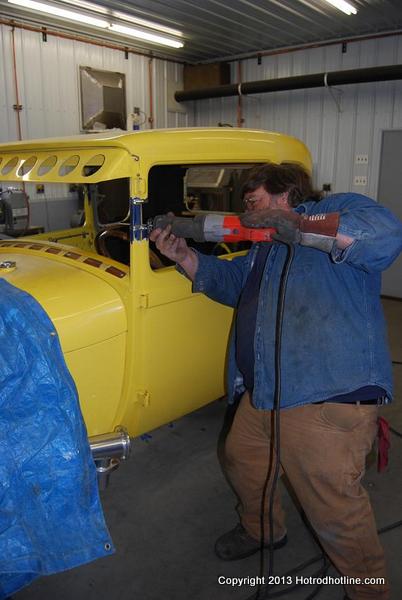
Sawz-All nips off the metal left in the middle of door post.

Windshield post gets cut in about the middle, cut on door post is higher.
Wooden block holds A pillar up so B pillar doesn't pinch cut-off wheel.
Cut from notch straight to the belt line so pieces fit like a "jigsaw puzzle."

Continue 3-inch chop along the belt line to the rear quarter window area.
When 3-inch strip is removed, top of the notch will drop to bottom of notch.
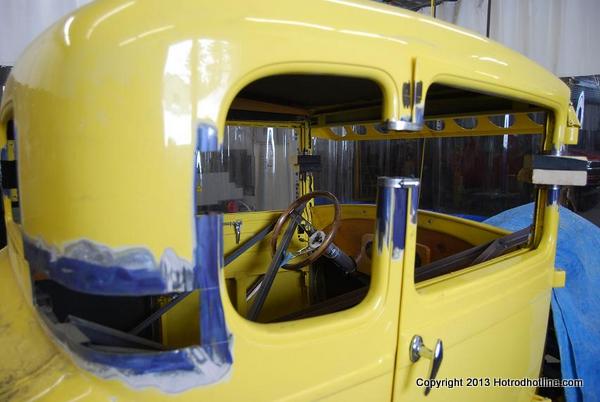
Pull out the blocks and drop top into position. It's not quite THAT easy, but it isn't hard, either. You can do this at home.

See how a 3-inch chop adds to the looks of a Model A five-window coupe.
Get helpers and lift the roof off the car and completely remove it.
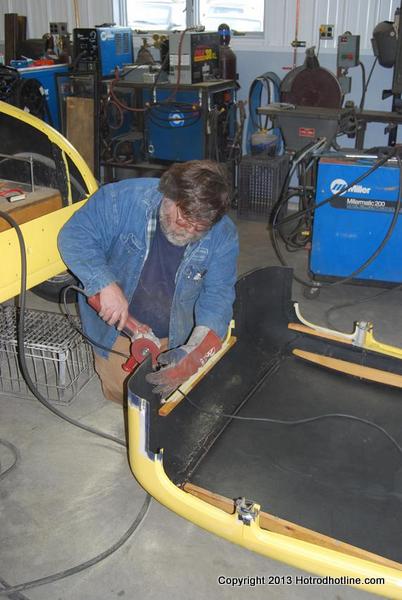
Use a small grinder to flatten off all the cuts and make a perfect fit.

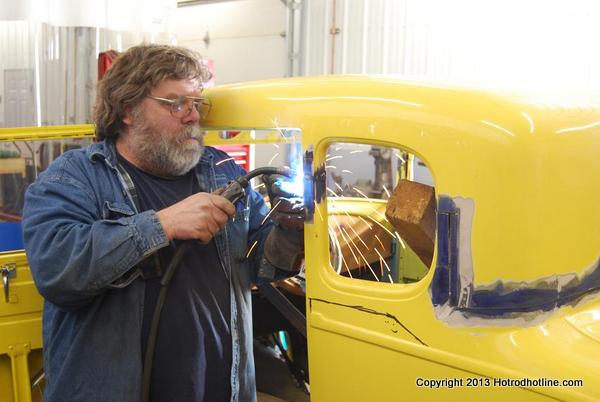
Tack weld the roof in position.
Use a 2 x 4 as a spreader to position roof post prior to welding.
Special thanks to:
Mark Seidler
Phoenix Machine
E8787 Steinberg Lane
New London, WI 54961
Phone: 920-841-0500
[email protected]