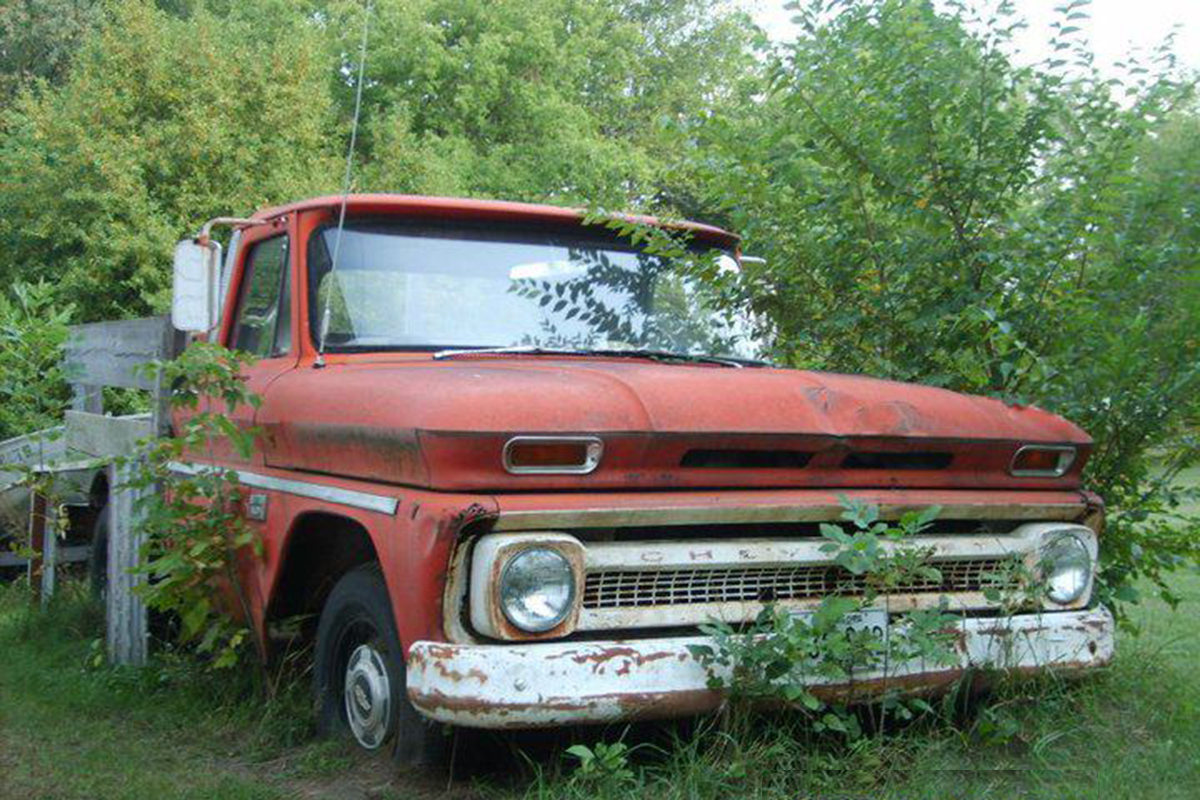
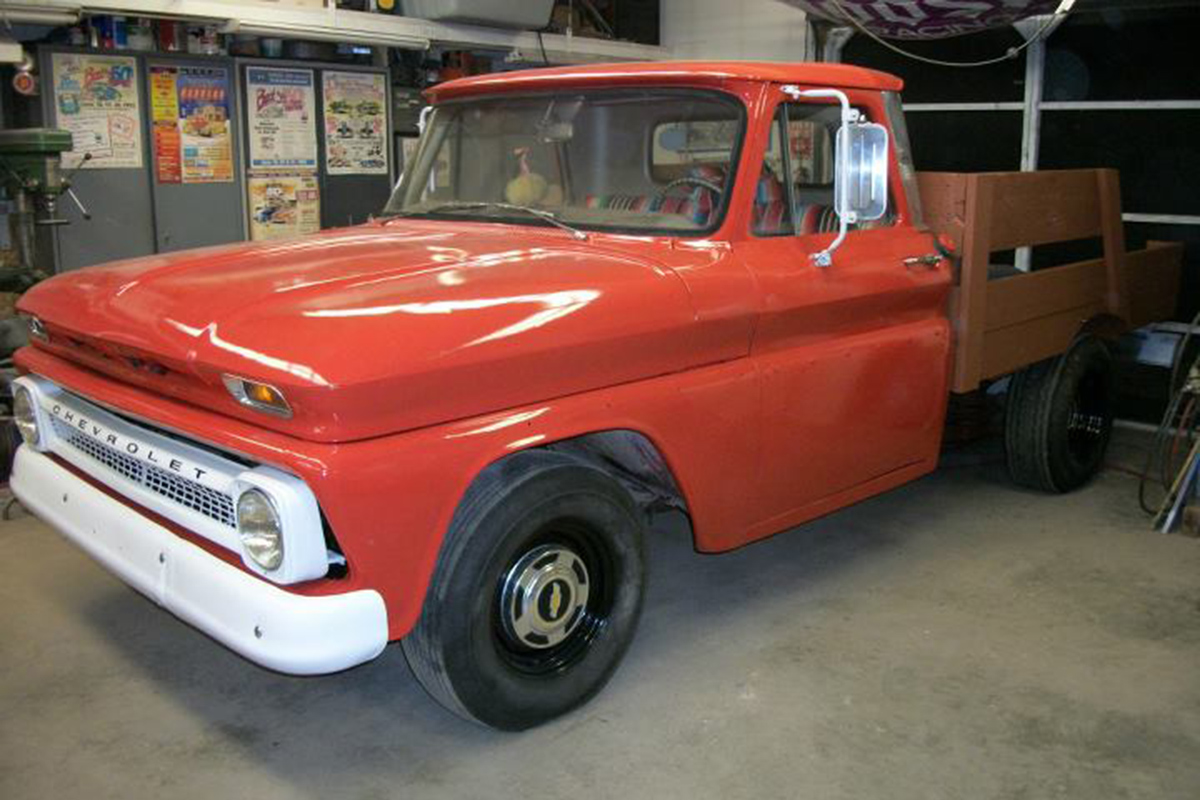
The ’65 Chevrolet C10 that Luke restored sat in a Midwest yard for 20 years. There was a tree growing through two holes in the floorboards. Luke resurrected it from the dead in much less time and for much less money than most would imagine. Words: Mike Aguilar. Photos: Luke Merrill.
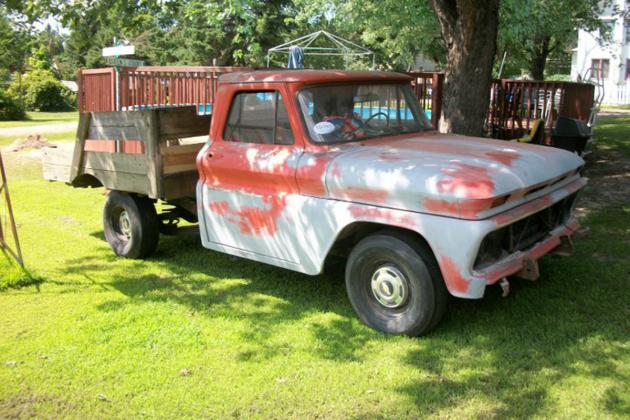
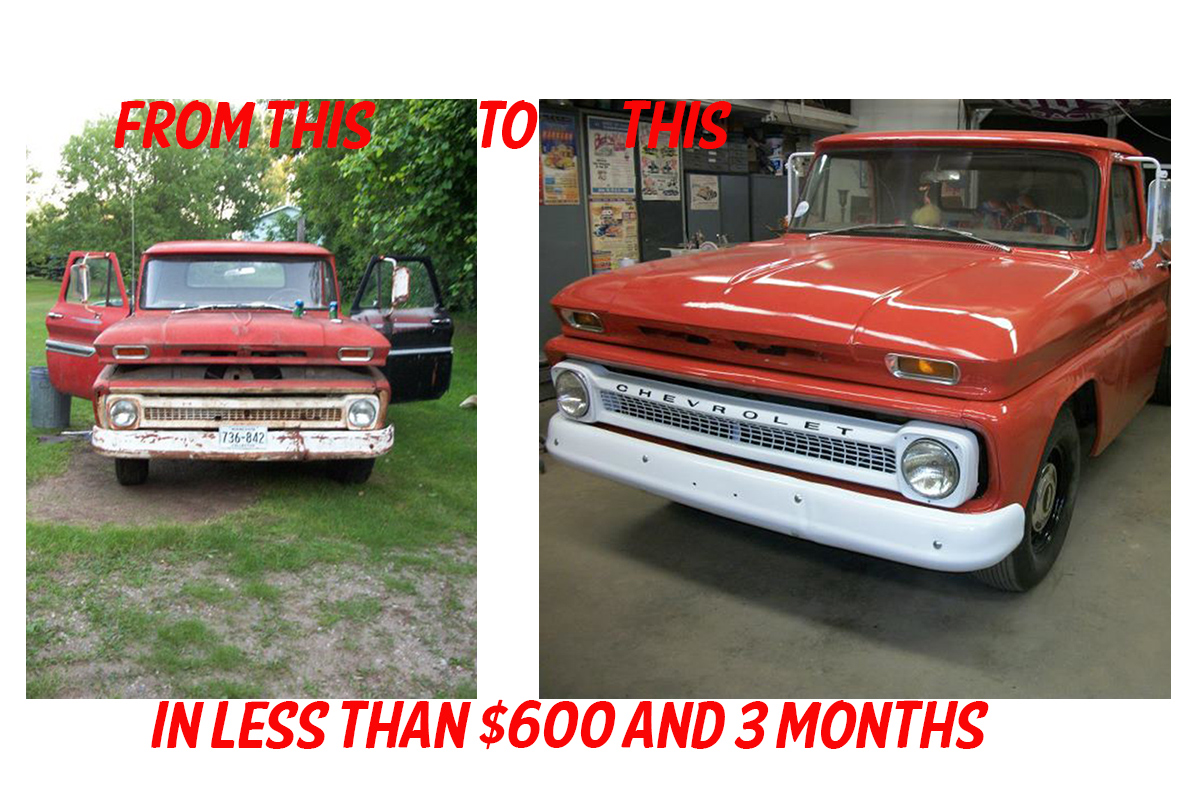
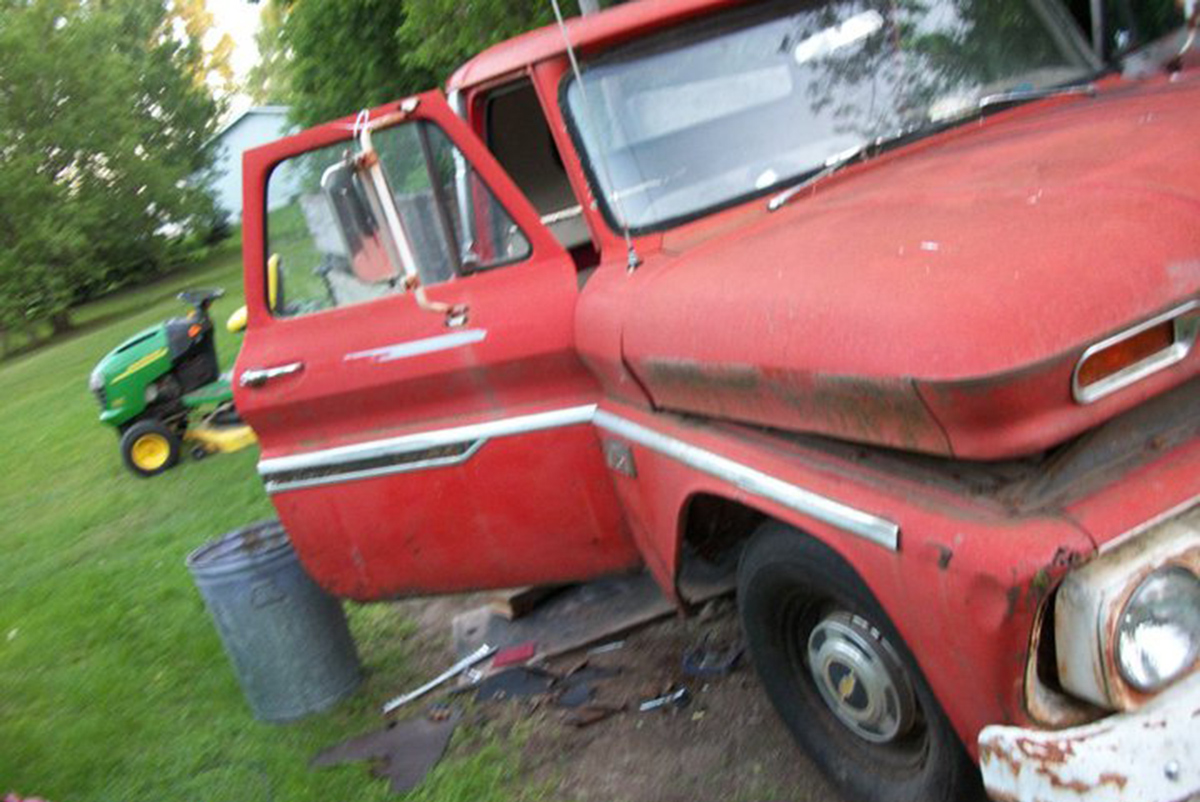
Even if you do your own work, restoring an older vehicle can cost you thousands of dollars. This is especially true if the vehicle in question has been used and abused, like this rare 1965 Chevrolet C-10 pickup. It gets even worse when the vehicle has sat in the weeds in a backyard in the Midwest for close to 20 years. So imagine my surprise when Luke Merrill told me that he’d restored his family’s ’65 C10, nicknamed Big Red, for less than $1000.
Big Red’s History
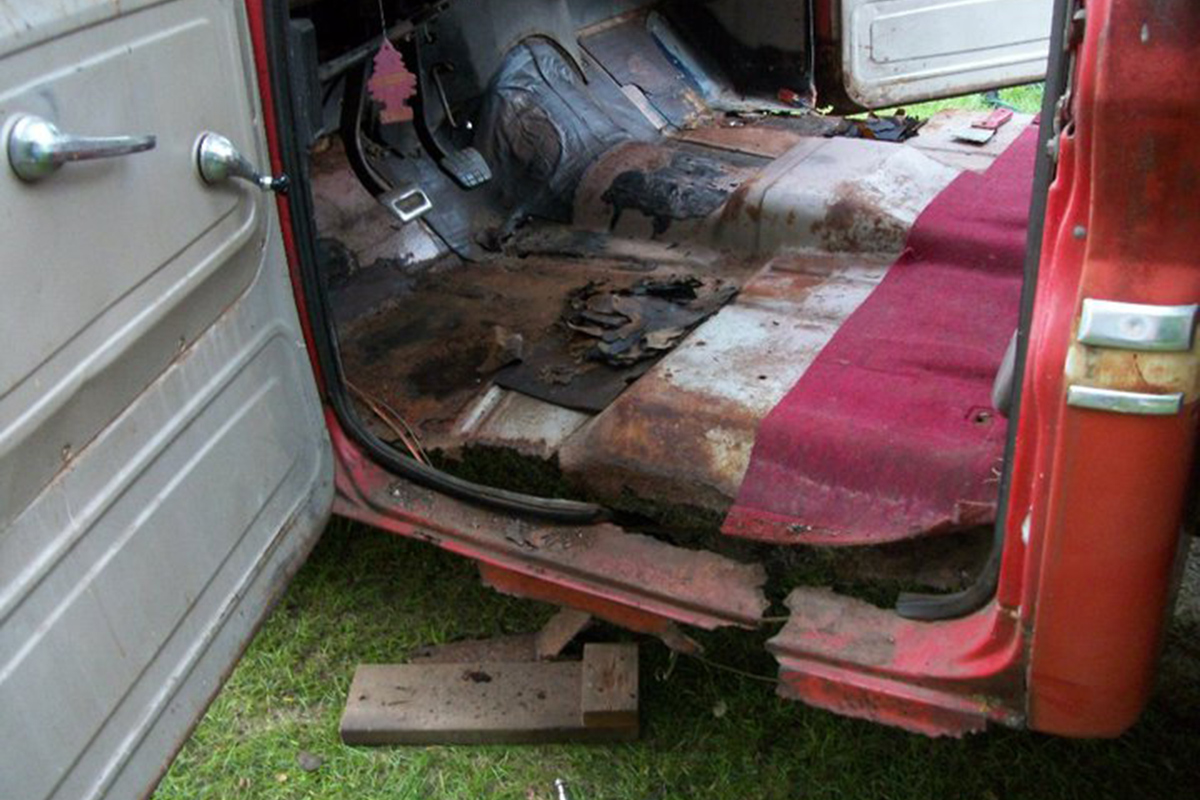
Some of that tree you see is growing through the floorboards!
The truck has been in Merrill’s family for decades. His hot rodder godfather sold it to Merrill’s father in 1990. Dad used it as a swap meet rig for about five years. At the time his dad built running boards and sandblasting cabinets, so the truck was ideal for his purposes. Then one day in 1995, his dad stopped driving it and it got parked in the weeds in their side yard.
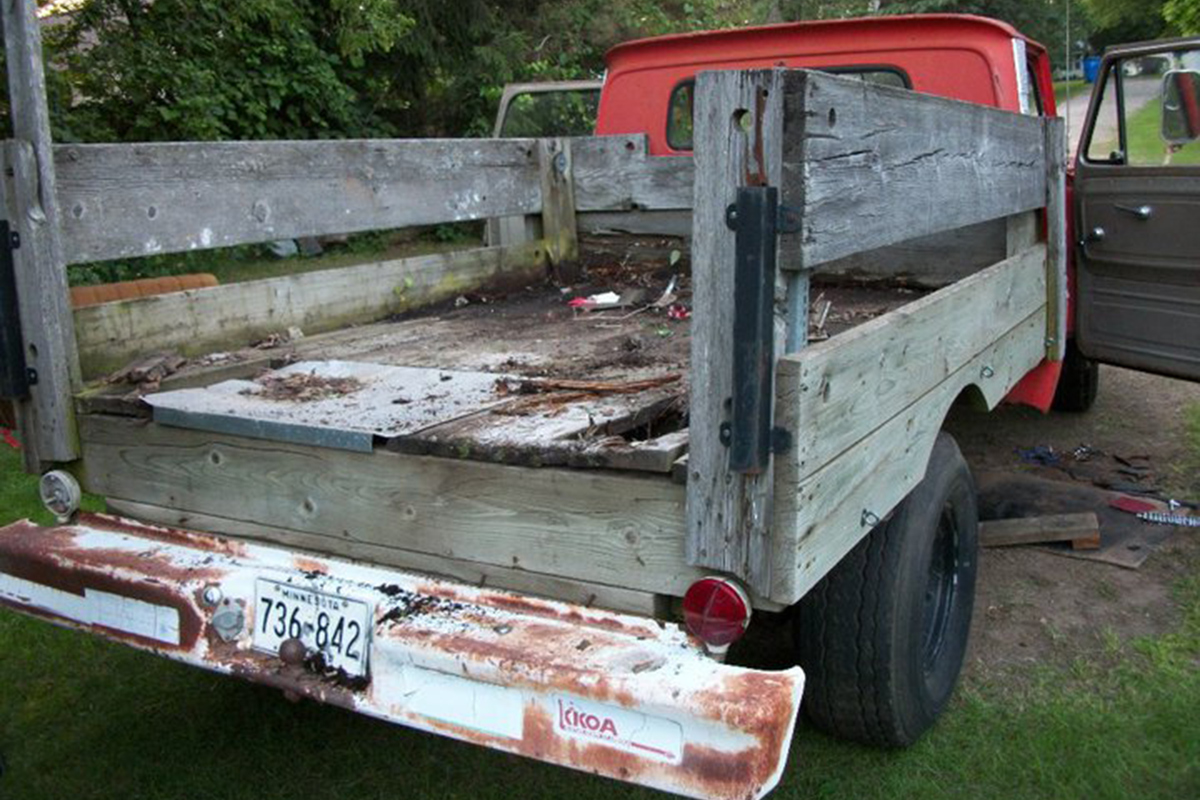
The truck had been converted years before to a stake-bed. Wood doesn’t like sitting in the elements either.
Once Merrill got his driver's license, he started bugging his mom and dad to give him his dad’s truck. They told him what many parents tell their kids: “Do well in school and it’s yours.” So he buckled down and got good grades through the rest of school. There it was in the front yard, festooned with balloons and a sign reading “Congrats Luke!” when he came home from graduation.
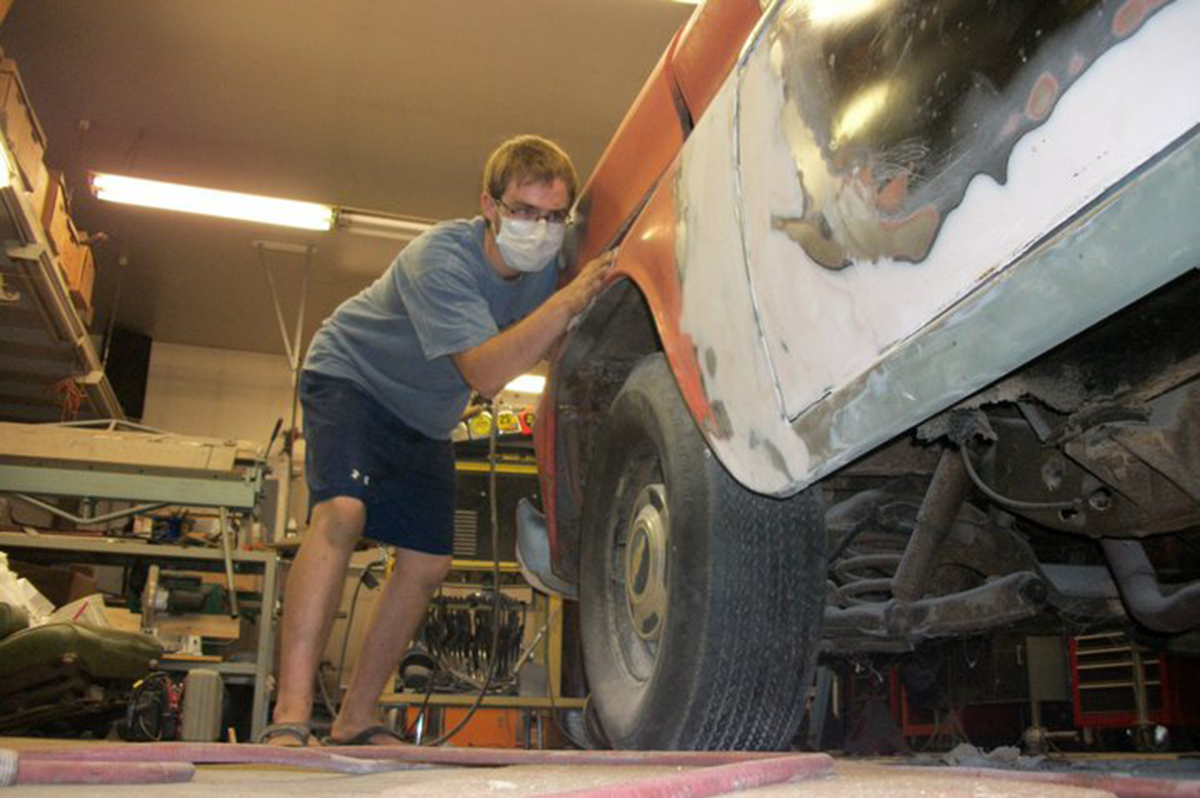
Merrill had to clean the truck enough to bring it into the garage to work on.
This is kind of funny looking back at it, because “dad’s truck” is not really the red ’65 C10 you see in most of these pictures - it’s actually a very nicely restored green 1941 Chevy pickup. Needless to say, Merrill was a little disappointed that he’d been talking about the ’41 while his parents were talking about the ’65. He’s an optimist though, so he got over his disappointment quickly and instead looked upon it as an opportunity to build his skillset as a car builder and restoration specialist. He figured, “Hey, it can’t get any worse than it is already and at least I’ll learn something in the process.” So he got to work and they pushed it into the garage for him to work on over the summer before college. (Yes, his grades were that good.)
The Restoration Process Begins with Getting Rid of As Much Rust As Possible
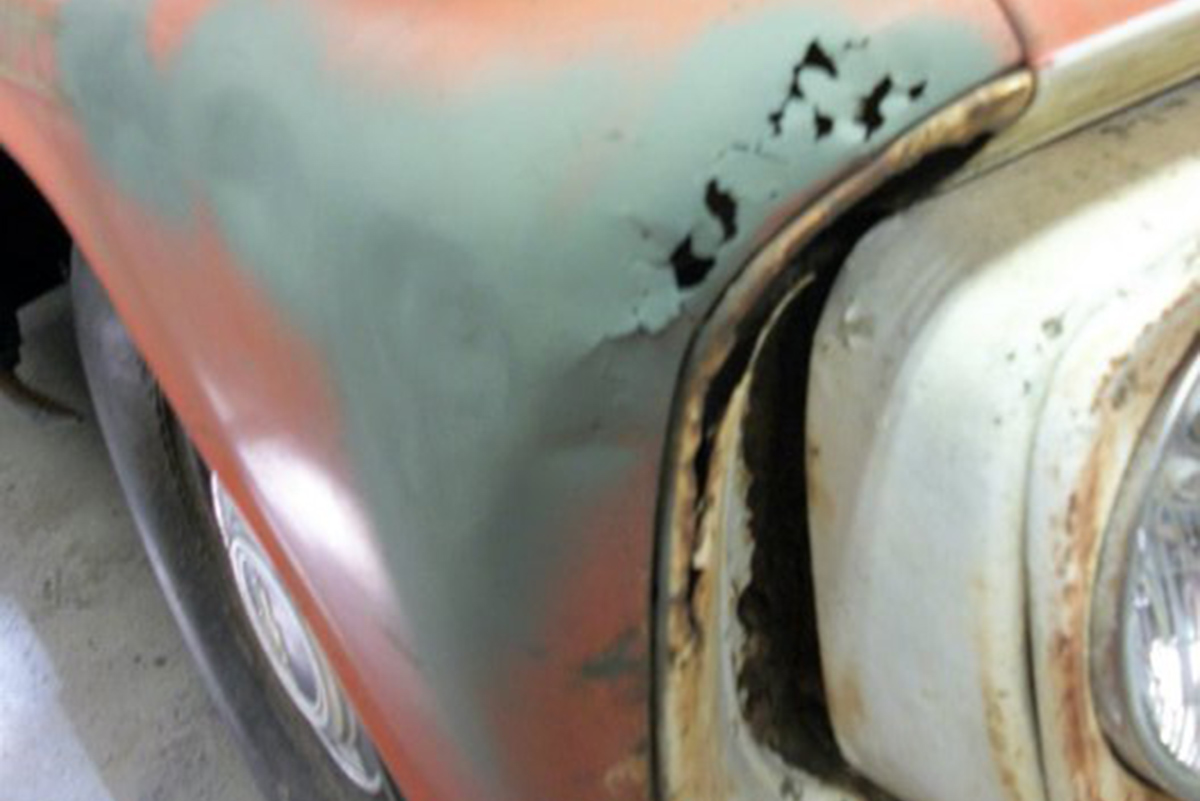
Some of the rust was pretty bad…
First, off came the body panels and the paint covering the rust. Being as conservative as possible, he cut out the portions of these that were rusted through and cleaned and sealed those that weren’t using POR-15 Rust Sealer and Preventative. He then welded in his own patch panels that he also did the metal shaping on. He used some old painted 16 gauge steel sheets they had sitting around to fabricate the patch panels, which meant no money was spent on steel for patching. These patch panels also got a coating of POR-15 to keep them from rusting before paint.
Some of the rust was really bad.
He started this process on the interior, since all of it would be covered either with panels or carpets, or possibly floor covers. This meant that he could get used to metal shaping and welding somewhere that wouldn’t be obvious to anyone looking at the truck. He said the interior was like a Fred Flintstone car, with the floorpans almost nonexistent. In fact, there were actually trees growing through the floorboards.
Not all the rusted areas were easy to access, either.
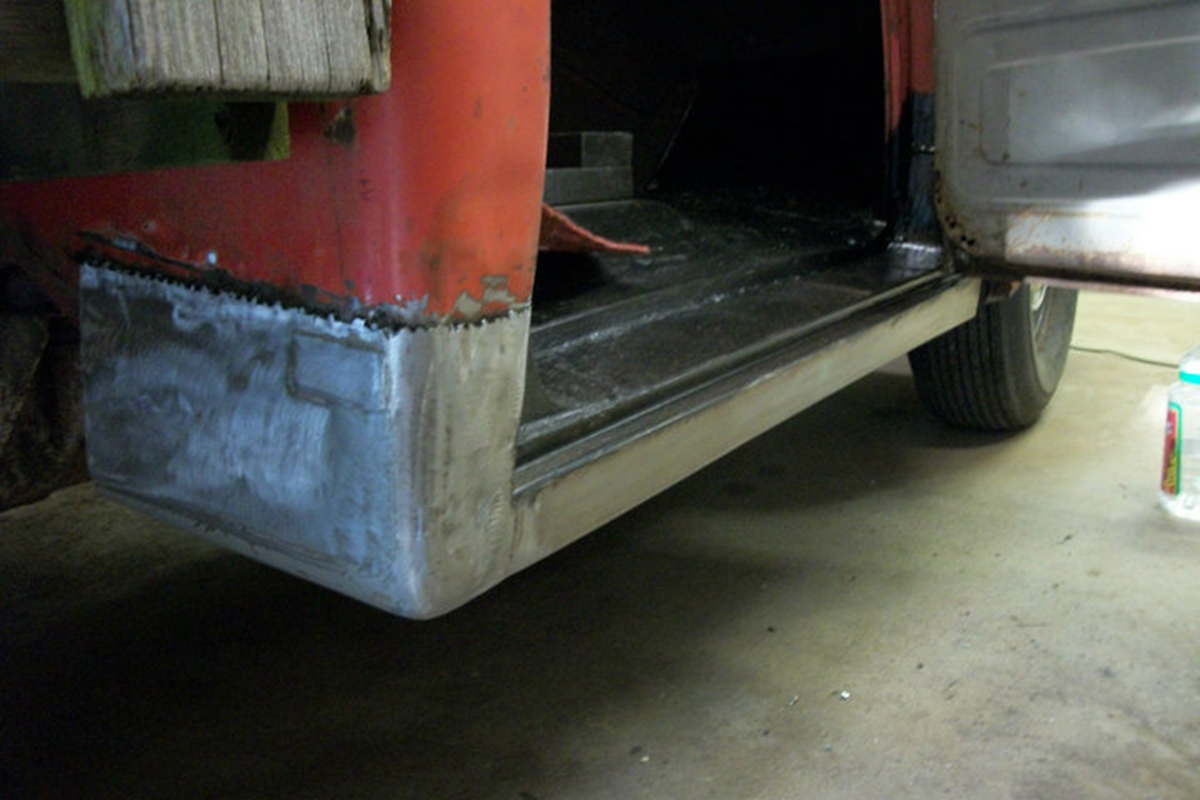
Once the floorpan was completed to his satisfaction, he moved on to the rotted out rocker panels. He used his dad’s small sheetmetal brake to measure, cut and shape the panels from scratch. One bit of humor in the restoration process is the fact that the cab corners are actually the rear fenders off of a vintage lawn mower, which just happened to fit the dimensions and contours of body exactly. He says they turned out much better than anything he would have been able to make himself with the limited shop equipment he had available to work with at the time.
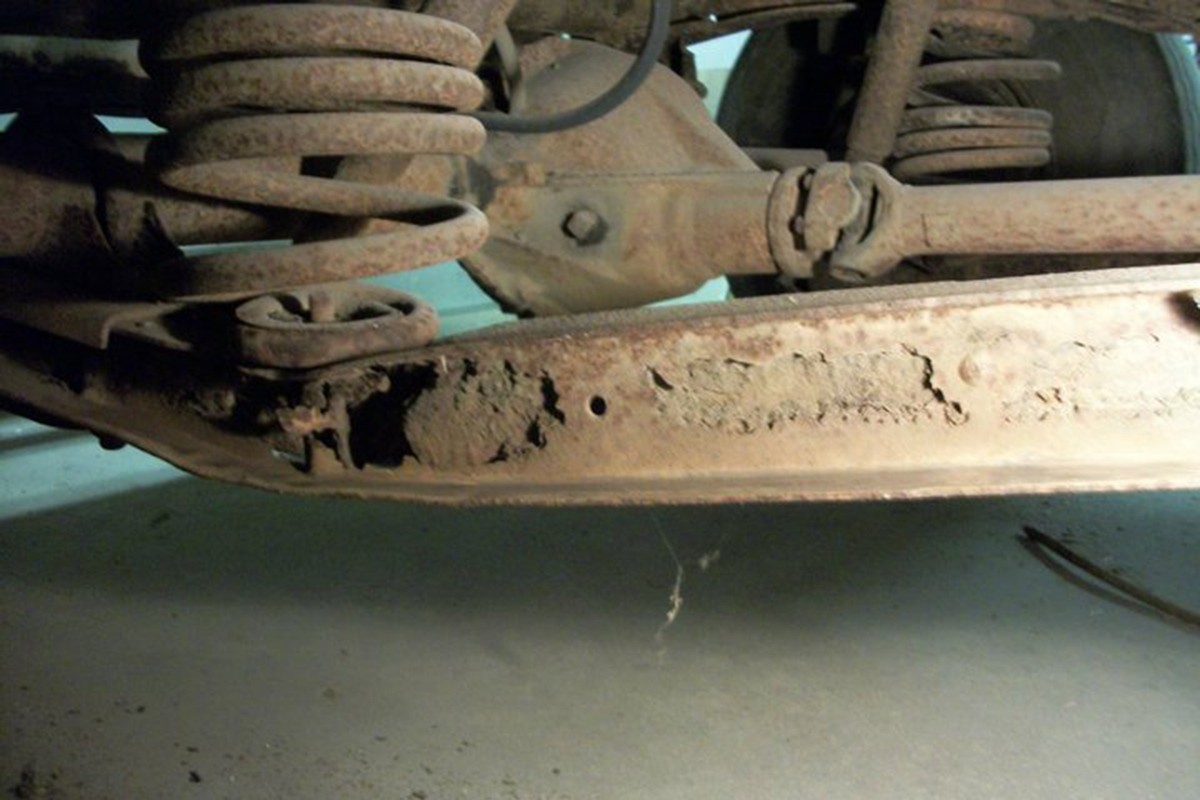
The frame before…
During his inspection of the undercarriage and suspension, he noticed this section of the frame was rotted out pretty badly. He cut the rotted section out and welded in a new section of heavier steel to strengthen the repair. He then coated the whole thing with POR-15 and primer for protection.
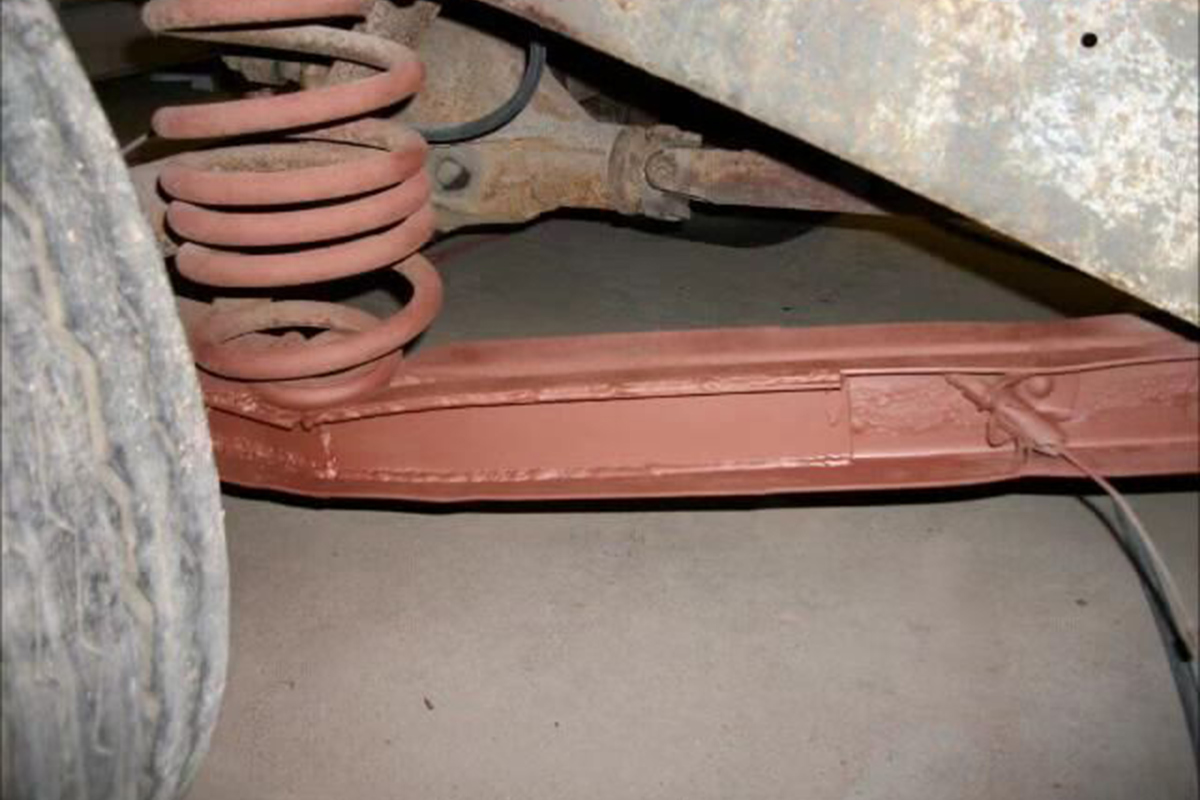
…and the frame after the repair.
Getting It Right Means Lots of Meticulous Detail-Oriented Work
New pieces welded in on the driver's side.
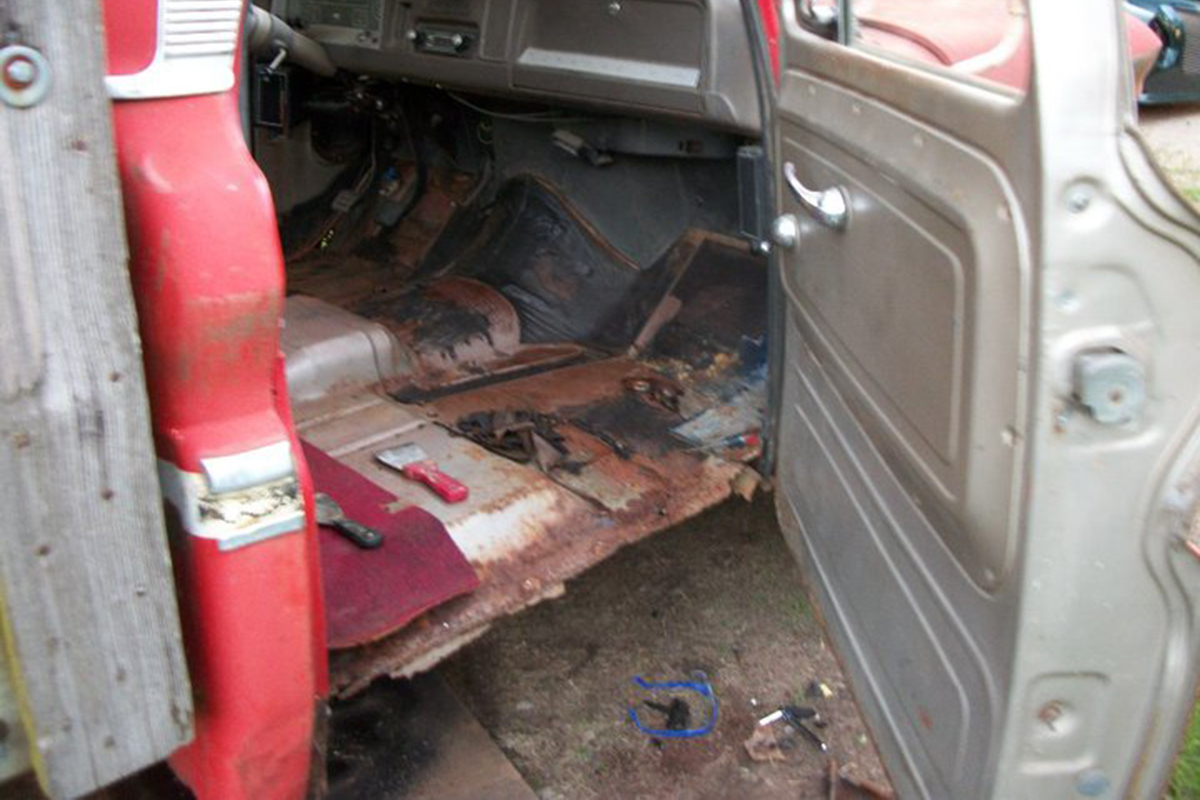
He pulled the doors off and then removed the door panels from them. He disassembled and cleaned the door hinges. He removed and disassembled the original door latches and window mechanisms, cleaning and lubing them thoroughly before reassembling them.
“Nothing is better than the old school mechanical stuff, in the sense that it can always be fixed or reworked, unlike today’s new parts that are made to be disposable” he explained.
You’d never know that Merrill had never done much welding before he tackled this project.
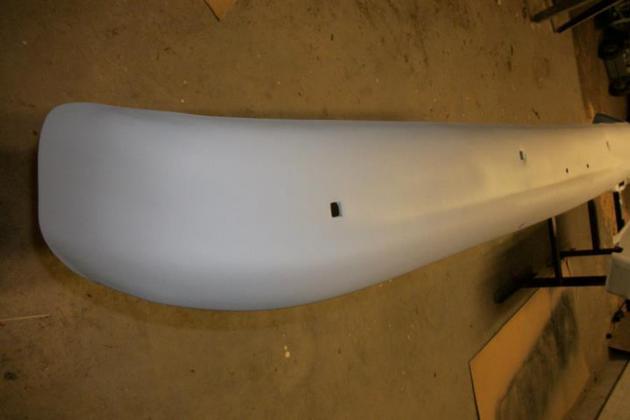
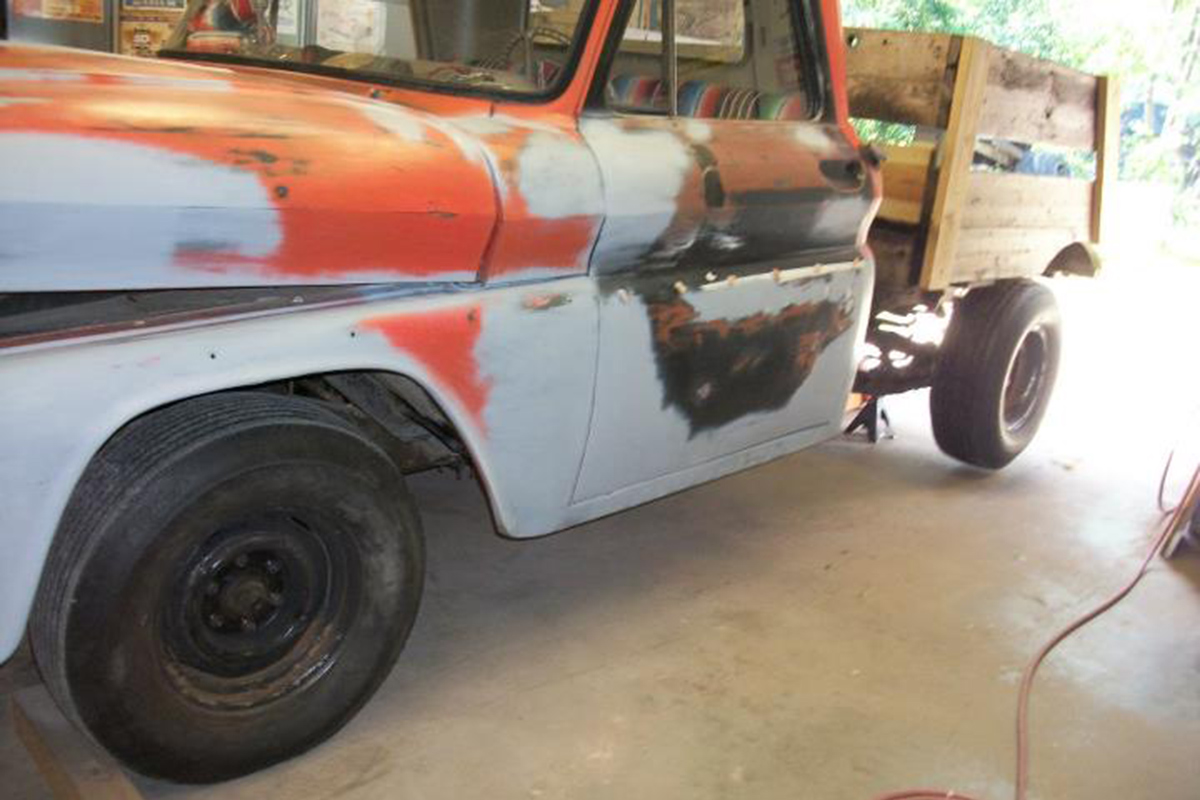
Next came the finishing work that comes before paint prep - the bodywork. This is where he first started spending money on the restoration; he needed to buy a few 2X6s and some fiberglass stranded body filler. Most of the body work was of the old school hammer-and-dolly (a block of wood behind the panel being hammered) type. The wood was used to replace the wooden bed that had been installed years before and had rotted in the weather.
For the limited budget he had and the total lack of professional tools, very little Bond-O/body filler was used. Most dents were removed with hard work.
When he couldn’t get to the backside of a body panel to use the hammer or dolly, he used a dent puller that he built himself using an old engine harmonic balancer and a piece of tubing with a pointed end that he tacked to the spot that needed pulling. The harmonic balancer was loose on the tube and he used it as the hammer weight to pull the dent. Even though he’s since opened his own professional shop to do this kind of work, he still uses it to this day. Of course, since opening the shop, he’s added a number of other tools to the toolbox, but he still believes in doing what you can with what you have.
Saving More Money on the Interior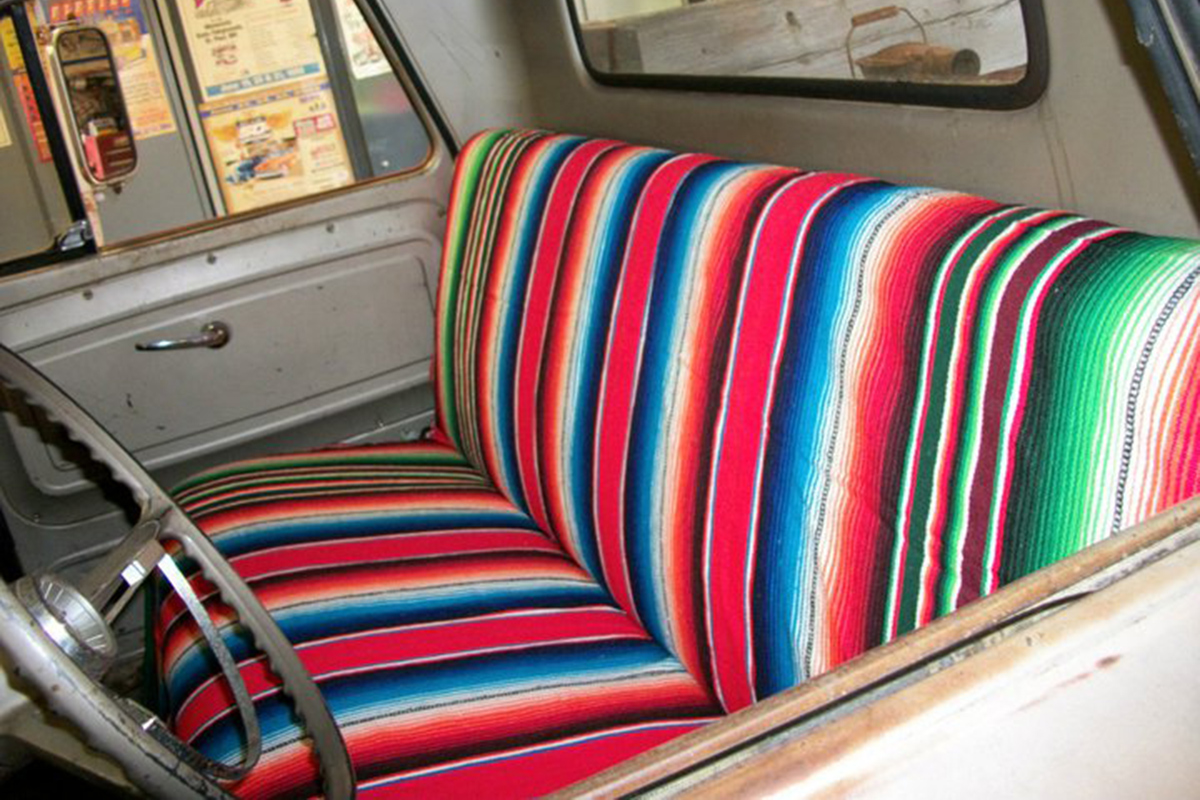
Who needs to spend hundreds reupholstering when a two-buck blanket looks as great as this?
Next came fixing up the interior for as low a cost as possible. He pulled the seats out and thoroughly cleaned and primered the portions of the floorpans that he didn’t have to replace. The dash was cleaned and the paint touched up. After the bench seat was reinstalled, he covered it with a Mexican blanket that he bought at a yard sale for two bucks. It may not be perfect, but it works just fine for his needs.
Prep and Paint Cost Him Just Over 50 Bucks and Time
Big Red sits ready for its all-over coat of primer.
Merrill knew that the key to a good paint job is ensuring the prep work is done properly, so he did quite a bit of smoothing and block sanding to get his weld joints perfectly smooth. He then went out and bought a couple cans of white Rust-Oleum automotive primer in the spray can - yeah, the kind you can buy at Home Depot or Lowe’s or even Ace Hardware.
The white primer was too bright and because of this, it ended up giving the orange-red paint too much of an orange tint when finished.
He bought a gallon of an orange/red paint for about 50 bucks. He taped off the truck and the garage and then sprayed the truck himself, hoping for a sunset red-orange color. However, because the white primer underneath was so bright, it came out more orange than he was hoping. He chalks that up to a learning experience.
He even used an "old fashioned" gravity-fed spray gun, even though this was also the first time he ever squirted paint on a vehicle.
This was his first ever time painting anything with a spray gun. He used an old school siphon-feed paint gun. Most guys these days use what’s called an HVLP (Hi Volume, Lo Pressure) top feed spray gun. Although a couple bugs decided to land on the fresh paint as it was drying, he said there were no runs and no significant orange peel when he was finished. He wanted to get something of a satin finish with the paint job, so he added some baby powder to the paint mix. However, he thinks he didn’t use enough because the finish wasn’t “satin-y” enough - something else he chalks up to a learning experience. He also cleaned up the original wheels, bumpers and other components and then sprayed them all with Rust-Oleum as well.
Making Sure the Mechanicals Still Work
These old engines aren’t like those of today. Let it sit for 20 years and all you should need to do to get the engine running is change the plugs and wires, check the distributor, change the fluids and filters, swap out the gas in the tank(s), pump a little transmission fluid and clean oil through and you should be good to go. Merrill’s straight six 250 (swapped in from a ’71 El Camino by his godfather years before it was sold to his dad) had leaky gaskets when it was parked so many years ago, so all the top end gaskets were replaced. The distributor and pump bellows in the fuel pump were both shot, so those were replaced. Although he knew the carb needed some work, it worked well enough for the engine to run decently, so he left it for the time being and placed an order for the rebuild kit. Since it’s a pretty rare carb, the kit took a while to be found and delivered.
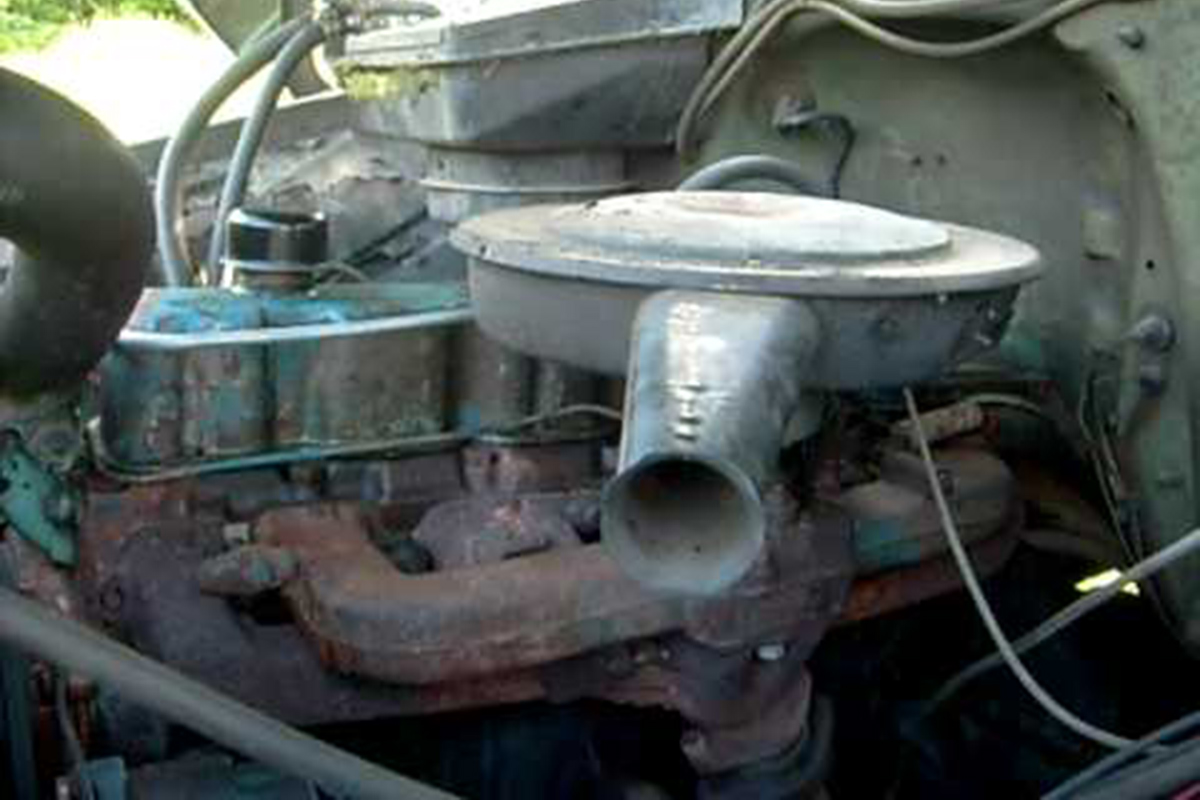
Merrill didn’t do anything under the hood except get the engine running. He tells me there wasn’t enough rust in the engine bay to warrant him taking time to address it. He has plans to install something new under there and when he does that, he’ll clean up the engine bay prior to installing the new engine.
Next he moved to swapping out the fluids in the brake system, transmission, and rear end and checking the condition of the suspension. Knowing that the column-mounted shifter mechanism has problems when it’s not used regularly, he took it apart completely and cleaned and lubed it thoroughly until its action was smooth as silk.
As he was inspecting the brake lines prior to flushing the system, he discovered that most of the lines were rotted out, so he bought straight lines and custom bent them himself. He also replaced the brake hardware that was falling apart. The BIAS PLY Sears brand tires that have been on it since the early 80s were still in excellent condition, so they were kept.
Merrill says he wasn’t looking for a perfect restoration; he was just looking to get it looking good (he did) and safe to drive (it is) - he was satisfied. The pride he felt in bringing the job in for just under $600 total gave him an interest in bringing old cars back from the grave, something he does these days at his own shop, TinMan 2 Kustoms.
Believe it or not, Merrill tells me he didn’t even know how to change the oil in his mom’s car before he took on this restoration project. Now, six years later, he owns his own customs shop. This is pretty incredible if you ask me. It just goes to prove that anyone can achieve what they desire with enough hard work and patience.