By Wayne Scraba
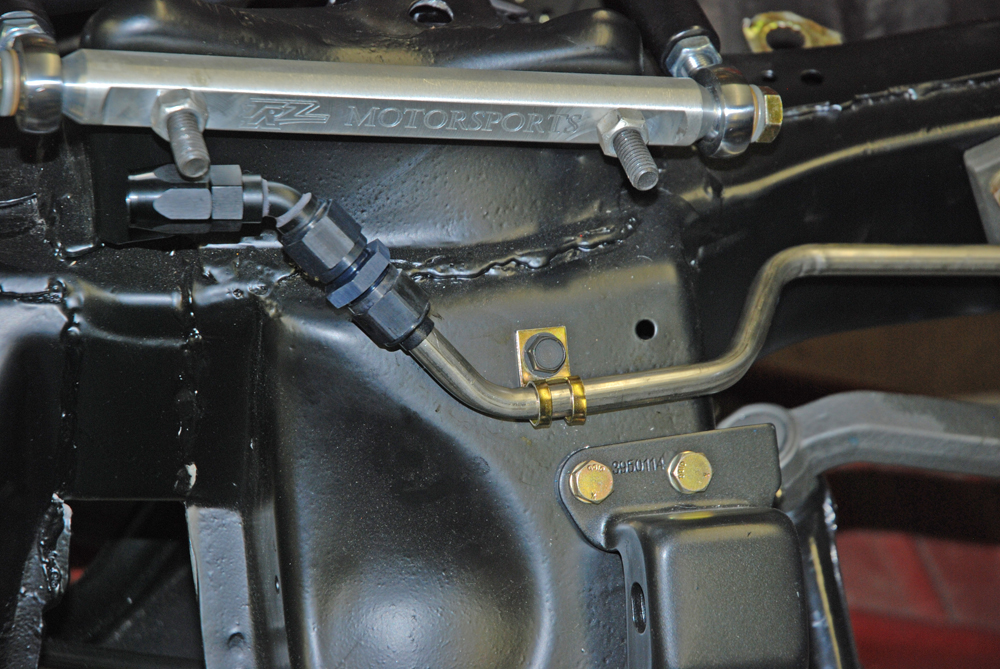
Braided AN hose is likely the most common high-end fuel line you’ll find today. It’s relatively easy to work with, it’s available in a wide range of appropriate diameters, it’s comparatively easy to obtain and for the most part, it’s reliable. In some cases though, the inner hose liners are really not compatible with today’s gasoline. That’s why some folks plumb a big chunk of their cars with hard line and then use AN hose for flex connections. Fair enough. In these cases, the builder didn’t want to take the chance on the stuff we now call gasoline eating the braided hose inner liner. That makes sense, but the big question is, how do you cleanly connect the hard line to the AN hose? There are a couple of options (hose clamps are not one of them!), but the ultimate is to use an all-AN connection (by way of tube nuts and sleeves). Here’s how it’s done:
Materials: When I build fuel lines, I fabricate the pieces from 0.028-inch wall thickness, ½-inch seamless stainless steel tubing (some better auto supply stores sell it and so do aircraft parts houses – just make sure it’s sourced from North America, Germany or Japan). It’s available in a number of lengths, but for the average car, a 15-20-foot roll will give you sufficient material to accomplish the job and provide some extra for “mistakes”. For the ½-inch line I also make use of Earl’s fittings (part number AT981808ERL for the tube nuts and AT981908ERL for the tube sleeves). If you can’t find them locally, you can reach Earl’s Performance directly:
https://www.holley.com/products/plumbing_an_fittings_and_hose/
PH: 866-464-6553
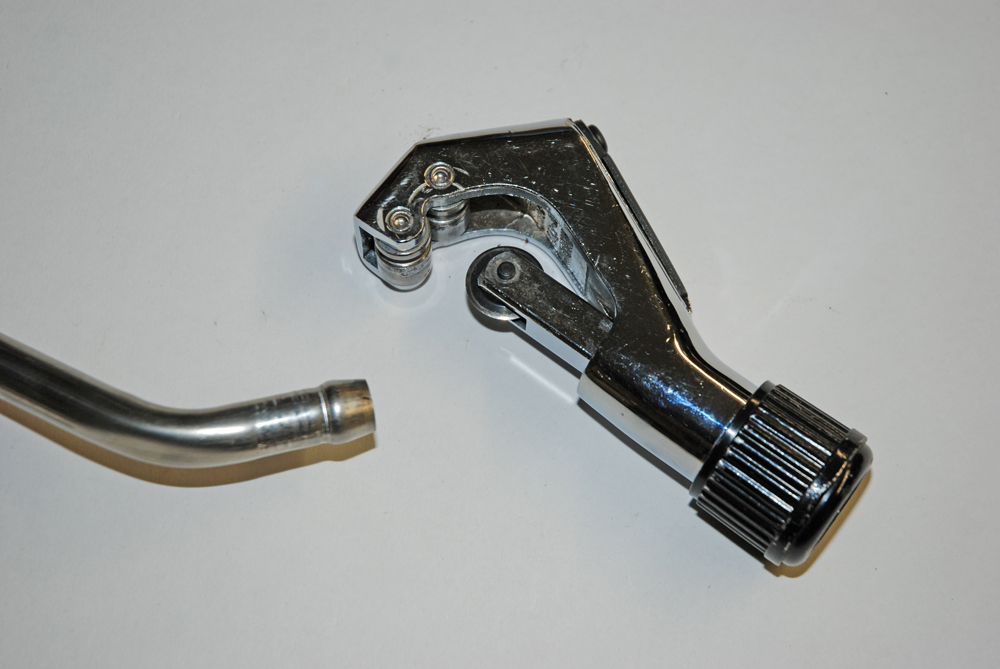
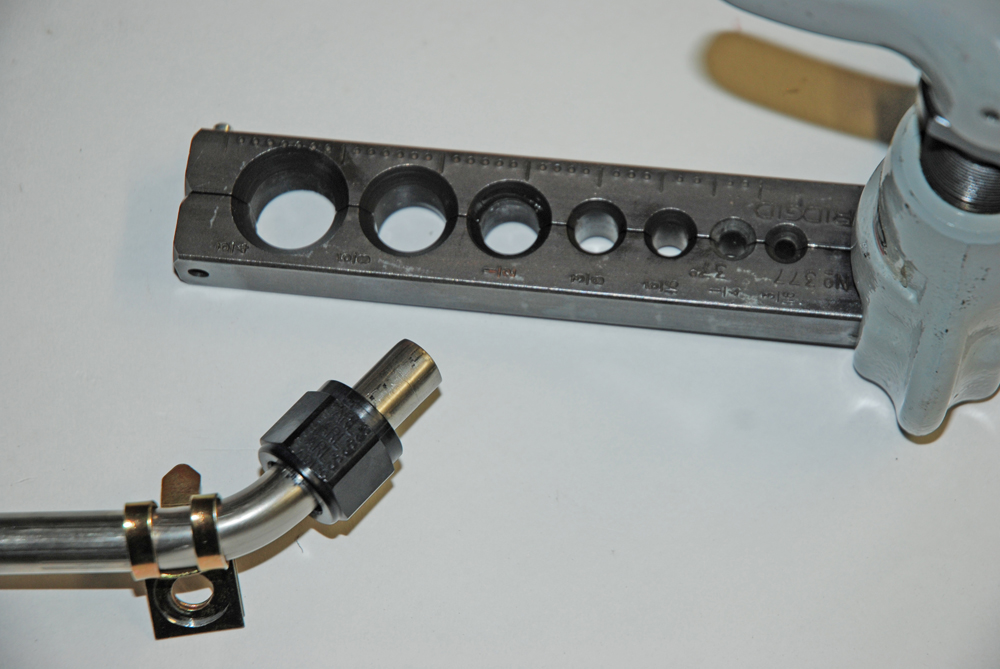
Tools: In order to assemble the tube nuts and sleeves onto the hard line, you’ll also need a few specialized tools — most of which aren’t common to the average toolbox. Here’s what you’ll need: A tubing cutter, and a 37° flaring tool. I’m not going to go into bending the line here – that’s another story. When it comes to flaring tools, it’s easy enough to find tools that work great on soft materials, but in this case, keep in mind the tools absolutely must have the capability of working 1/2-inch stainless steel hard line. In my toolbox, the tubing cutter is from Mac Tools, and the heavy-duty single flaring tool I prefer is manufactured by Rigid.
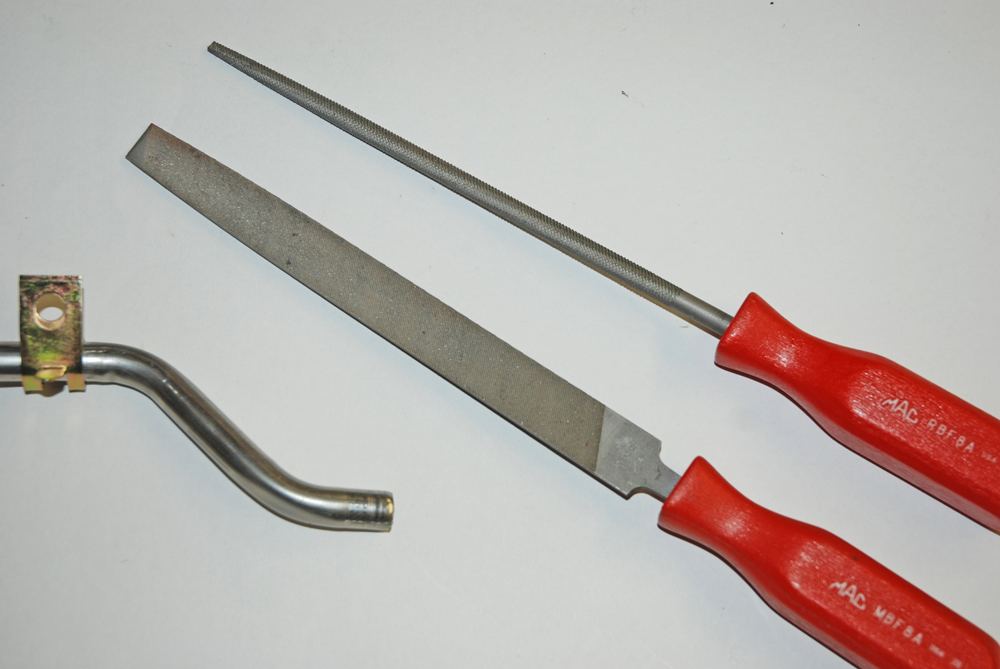
Making the Flares: In order to cut the line, simply mark the location with a felt pen and use the tubing cutter to slice through the stainless. Position the tubing on the rollers inside the tubing cutter, tighten the knob and turn the cutter around the tubing. While the cutting wheel bites into the tubing, continue tightening the knob. After a couple of spins around the tubing, along with a couple of twists of the adjustment knob, the tubing will be cut. With a good quality (sharp) tubing cutter, it won’t take much effort to cut the stainless line. What you’ll be left with is a clean cut, but it needs to be dressed. A small fine tooth file works perfectly for this job. I also take the time to completely debur the inside of the tubing. It’s a very good idea to add a wee bit of lube to both the inside diameter and outside diameter of the tubing prior to flaring. For this job, I use Earl’s AN hose assembly lube (part number 184004ERL). It’s tenacious and thick enough so that it doesn’t migrate from the “work site”.
Next up, install the AN tube nut along with the AN tube sleeve (see the accompanying photos for the orientation). Position the ½-inch tubing inside the flaring tool in the opening marked “1/2-inch”. Rigid recommends that approximately 0.100-inch of tubing must overhang from the flush surface of the tool.
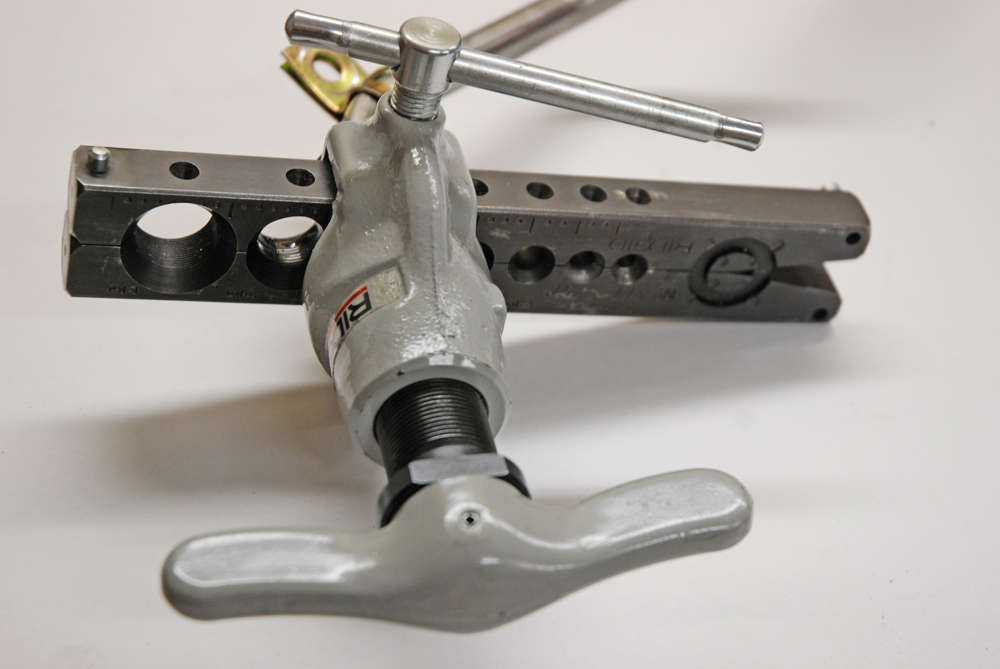
Carefully slide the tool head over the tubing. The side of the tool is indexed on each side, so it’s tough (if not impossible) to make a big mistake. Slowly tighten the side lever on the flaring tool. The tool head will slip into a respective recess in the tool body where it self-indexes with the section of tubing. At this point, fully tighten the side lever. It must be tight so that it soundly grasps the tubing.
Next, tighten the (large) top handle of flaring tool. While tightening, it’s a good idea to double-check the relationship between the tool die and the tubing (simply look inside the tool as it is tightened). If it looks right (and it should provided it was properly indexed), keep tightening the handle. Basically what you’re doing is to form the flare. Once correctly formed, the tool will automatically release by way of an internal cam. You will be able feel the actual release, but it’s a good idea to continue tightening the large handle until it engages a cam second release (often a turn or two on the handle). Turn the handle counter-clockwise. The flare has been formed and the tool is released.
In order to remove the tubing, release the side lever on the tool and open the jaws. Once out of the flaring tool, take the time to lightly dress the flare with a fine tooth. This tends to remove any small die marks from the end of the flare and from the area behind the flare. Clean off any remaining assembly lube.
Pull the tube sleeve to the flare followed by the tube nut. Always double-check the fit. Why? Simple. If you make a mistake once the line has been bent, you’ll have to cut the end off and start all over again. Not only is that more work, it also shortens the line. In order to check the fit of the flare, I usually keep a spare male 37-degree flare fitting on hand. The idea here is to ensure that the female flare fits cleanly on the 37-degree “cone” of the male fitting.
You’re done and if you use quality materials, and good tools you’ll have a great 37-degree AN flare on your hardline – ready to accept a male AN fitting. For a closer look, check out the accompanying photos:
A quality, sharp (!) tubing cutter makes short work of cutting stainless.
Once the tubing cutter has spliced through the stainless, debur both the outside and inside of the tubing.
Orient the tube nut and the tube sleeve. This is very important, because of the hard line is bent; you’ll never get the pieces over the bends.
Slide the tube nut and sleeve back and insert the tubing into the flaring tool.
Wit hthe tubing locked into the tool (see the text for details), turn the large top handle until the internal cam releases.
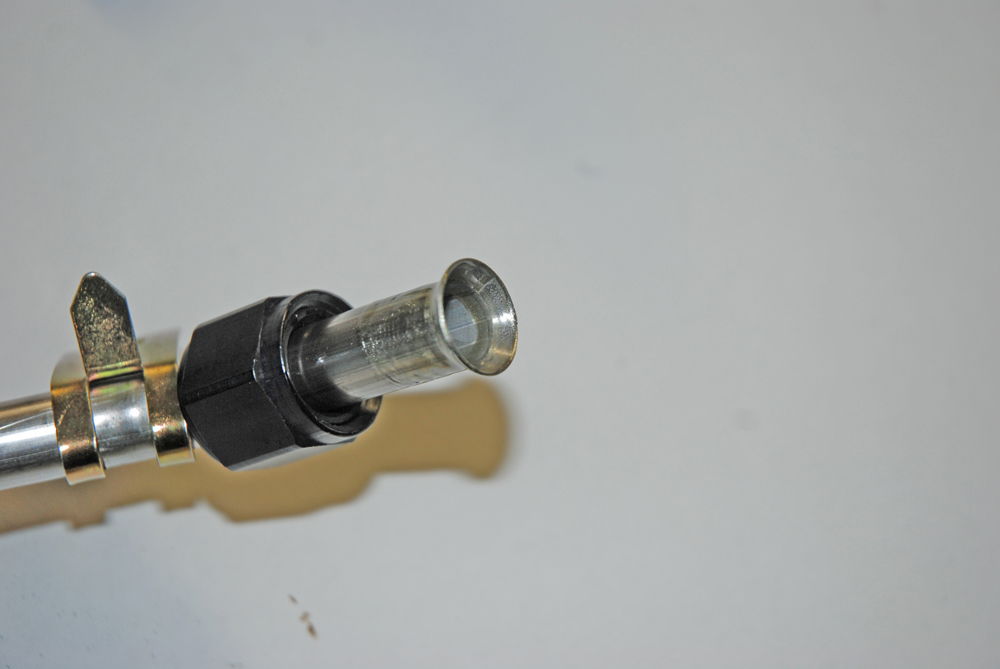
Here’s the finished flare.

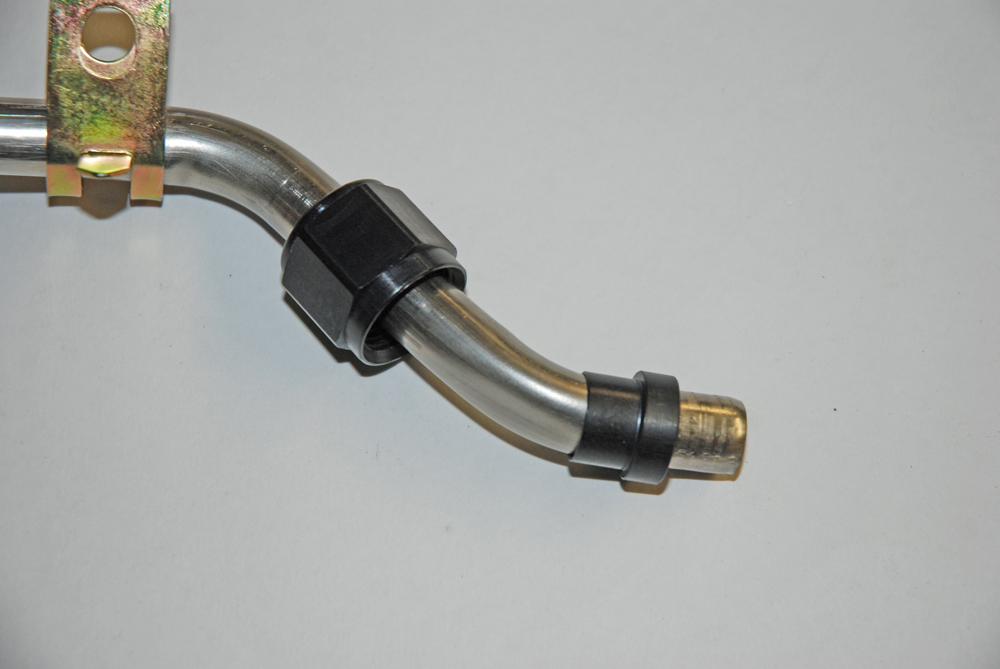
This is the finished product complete with a male AN-fitting installed. It’s ready to accept an AN hose end.
Getting Away With Single Flares
Many automotive fittings (including brake lines) have a 45-degree double flare. A-N fittings on the other hand, have a 37-degree single flare. Aircraft, various military applications as well as race cars and other race machines typically incorporate 37-degree AN fittings for hard line (you’ll be hard pressed to find a 45-degree double flare anywhere in an aircraft). What makes the 37-degree flare seal is the shape of the fitting “cone”, which coincides (exactly) with the shape of the flare. And if the fitting is heavily worn and doesn’t seal, you can add a conical seal to the end of the flare. In the end, the tube nut and tube sleeve physically lock the flare and the cone together.
For the most part stainless hard lines need to be flared at 37 degrees (which requires a special flaring tool) and not 45-degrees. One reason is due to the fact stainless steel hard line is too hard to double flare, and it will most likely split if you attempt it. A single flare at 37-degrees, on the other hand can easily be formed in stainless steel, provided you have the correct tools. The 37-degree AN flare is designed to seal with a special tube nut and tube sleeve assembly. You cannot interchange 37 and 45-degree fittings and flares. If you use a 37- degree flare where a 45-degree fitting is incorporated (and vise-versa), it will not seal properly.